Visualising the physical environment has never been easier, thanks to powerful end-user devices running mapping software with hardware acceleration. The latest step in the evolution of mapping is the shift from “2.5D” representations to full three-dimensional terrain and models. The OGC standard for this novel format is called 3D Tiles.
Making the jump from 2D to 3D has two key challenges: creating a rich 3D model and delivering it efficiently across bandwidth-constrained networks. Solve both, and the reward is a step change in situational awareness, especially for indoor or subterranean environments.
Creating models can be done in a variety of ways. Architects and Engineers have long used CAD software to produce precise design models. For smaller budgets, open source suites like Blender (which we have a 3D plugin for) allow users to build detailed 3D models which can be exported to open standards like glTF.
Beyond LiDAR
The start point for model generation is often a LiDAR scan. The entry price to this once exclusive technology has plummeted, and is now available on most smartphones with free apps. By converting large point-cloud data into mesh models, users can create models which represent the physical environment, including complex features that a map cannot convey, like tunnels, bridges, arches and mines.
Adding a vertical dimension makes this a cubed problem versus squared, which exponentially increases both the computational requirements and file size. This is a challenge found at every stage of 3D model creation and display. Working at the edge means pushing low(er) power hardware to the limit as processing LiDAR data demands intense computational effort. Once converted, the large model must be shared efficiently across a constrained network.
Advances in edge compute, resilient data networks, and open-standards have made creating, displaying, and sharing 3D models at the edge a practical reality, not just a possibility.
File formats
The integration of LiDAR sensors into commercial off-the-shelf (COTS) systems, including smartphones and UAVs, has greatly reduced the barriers to entry for LiDAR scanning.
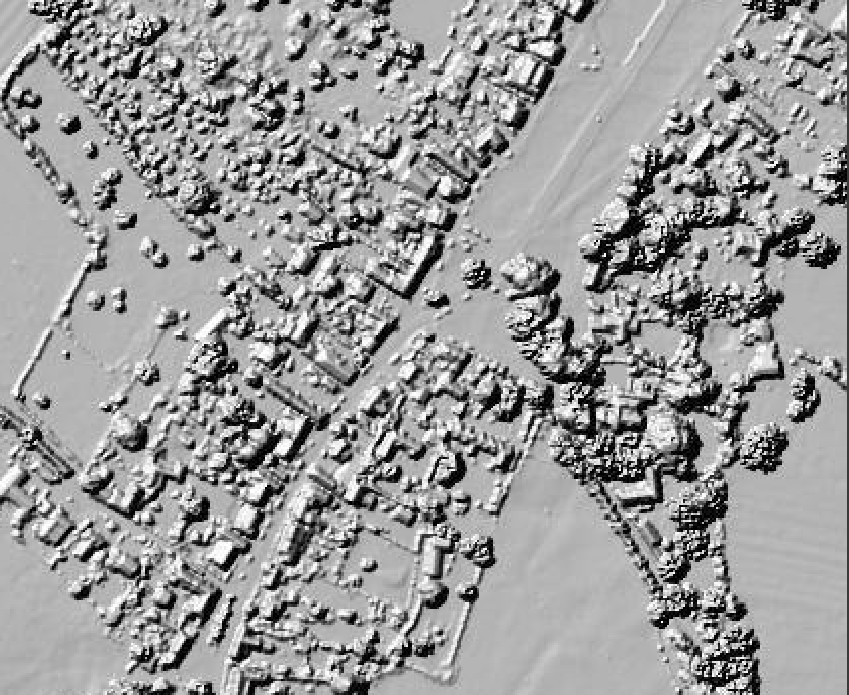
The ability to capture LiDAR produces an accurate representation of the environment, something that is difficult to achieve with user-designed 3D models. For radio engineers interested in obstacles, high-resolution LiDAR scans often include unwanted clutter such as wires crossing a street or mine, which must be filtered out with post-processing, else they will compromise a 2.5D digital surface model.
Regardless of how a 3D model is created, it should be shared in an open standard.
Proprietary vendor formats place an unnecessary burden on operators, requiring specialist software, licence fees, or post-processing before a model can even be viewed, let alone used to solve a problem. Open standards remove that friction so a user doesn’t need to know how the model was produced; they simply receive something that works.
Examples of open LiDAR formats include OGC LAS/LAZ and e57.
3D model formats have evolved. Older standards such as OBJ and b3dm were designed for specific workflows and pipelines, not for streaming, distribution, or interoperability at scale. Styling is often separate from geometry.
GLB, the binary form of the open glTF 2.0 standard, solves all of this. Geometry, textures, and materials are packed into a single binary file, making models compact, self-contained, and ready to stream.
Side-loading a model
Models can be side-loaded as the older B3DM format and newer GLB format as well as 3D Tiles. If you come across 3TZ in the wild it’s just a zipped folder containing OGC 3D Tiles and can also be left as .zip. Side loading 3D Tiles allows the structure to be read locally from the phone’s SD card instead of a remote web server.
Streaming a model
Pre-loading models locally onto the End-User-Device (EUD) has been the de facto standard for years, but it comes with several limitations; First, the local model is limited to the device it is stored on, so sharing a large model over the network to every client that needs it would be impractical.
To share 3D models reliably in a contested or bandwidth-limited radio environment, a client-server model is used, which mirrors how mapping is distributed with WMS and WMTS tile pyramids with zoom levels set by a user’s viewport.
Our investigation into the subject of creating 3D tiles started with the work produced by Bert Temme (https://github.com/bertt/cesium_3dtiles_samples/tree/master), whose work has explored the various open standards of 3D models and their compatibility with a 3D tiles pyramid as used and defined by the popular Cesium 3D globe.
Getting 3D models to render correctly within ATAK using 3D tiles involved plenty of trial and error, as the implementation and standards involved are complex and feedback on issues is minimal. The tileset.json file is the critical index that tells a 3D Tiles client what to load, where to place it, and how to present it.
Without a correctly structured tileset.json, a standards compliant GLB will not render in ATAK. Check your tileset.json
Through testing, it was found that ATAK’s 3D Tiles client requires the asset version to be declared as 1.0. Tilesets structured to the newer 1.1 specification were observed to be unreliable at the time of writing despite being supported in desktop viewers such as CesiumJS. This is assessed to be a temporary issue as 3D tiles in ATAK is under active development. An update was provided at the 2025 TAK offsite.
The minimal tileset.json that produced consistent results within ATAK consisted of three key components:
- An asset declaration at version 1.0
- An ECEF transform matrix to position the model correctly on the globe
- A sphere bounding volume defining the spatial extent of the content
Throughout this entire process, no licensed software or paid tools were required. By building exclusively on open source software, the workflow can be replicated by anyone.
Case Study – Photogrammetry 3D Model
The model used for this first example is a model from David Fletcher, https://sketchfab.com/artfletch, which is a photogrammetry model containing 1.4 million training images, 716.9 thousand vertices, and a file size of 71MB.
The GLB model was processed into 3D tiles with this Python script:
python3 GLB-to-3DT.py brathwaite.glb ./output/ --lat 51.523076 --lon -0.075226 --centre --compress --hag 60 --ground-snap This model has no geographic references anchoring it to a specific area. Therefore, when processing the model, we had to manually assign it’s posistion on the map. This can be done through the script through the -lat and -lon flags for WGS84 co-ordinates. The elevation above the ground in meters is assigned with the –hag variable.
The original model’s origin was offset from the model, using the script, the origin in all planes can be centralised. This was done with the –centre flag. The ground-snap flag is then used to place the origin at ground level. For obstacles such as tunnels, it is recommended to place them above the terrain on the map. A mine floating above the mountain is easier to explore than beneath the map!
The –compress flag enables Draco compression, a relatively new and powerful feature supported by ATAK. By using the tiling process, sub-tiles measured in Kilobytes are created and are only rendered when required.
Stream 3D tiles to ATAK
A common web server can host 3D tiles. The hardware required is minimal, like a small board computer (SBC). They can be dropped into a folder within the web root (public_html/www/) so HTTP clients can access them. For our testing, we used Python’s built-in web server.
Navigate to the output directory created by the 3D Tiles pipeline script and run the following command:
python3 -m http.server 8080 This starts a simple HTTP server on the computer which can be accessed over the network.
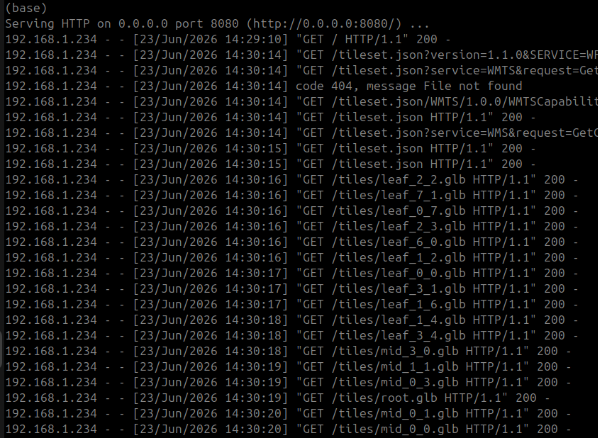
The 3D Tiles folder can now be accessed from a web browser from any connected device, confirming that the tiles are being served correctly. The server’s terminal will show GET requests from web clients.

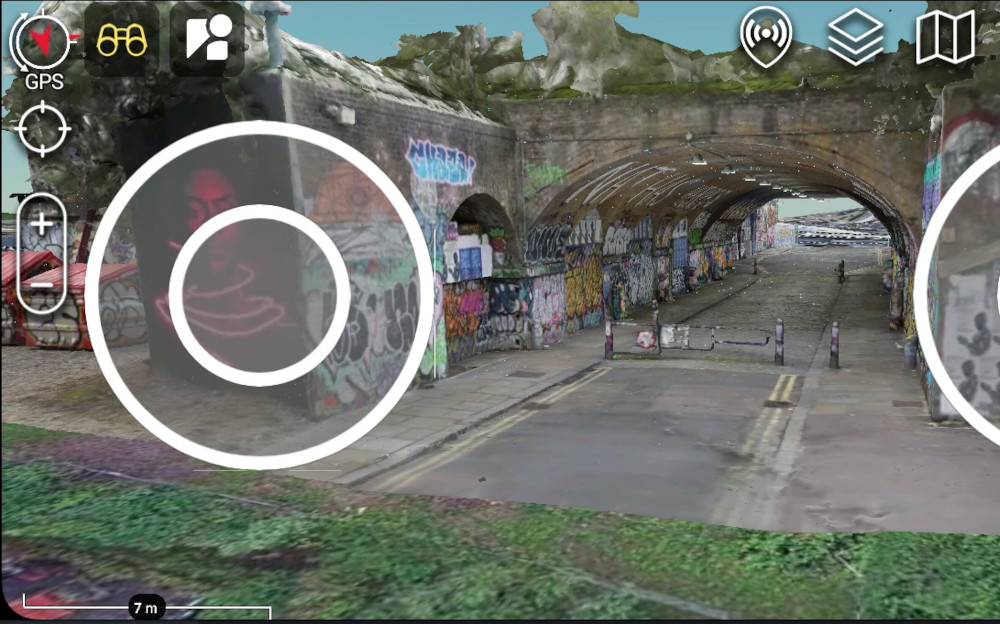
From within ATAK, select Maps.
On the bottom ribbon of the plugin menu, select the Map Source to Online, then expand the drop-down menu next to this. Press the Add (Cross) icon and enter the full URL to the tileset.json file. If your server’s IP address is 192.168.1.3 the URL would look like http://192.168.1.3:8080/tileset.json
ATAK will query the link and ask to confirm adding the new layers to the map. To confirm the tile source, check the checkbox next to the tileset.json then press OK.
Navigate to where the model is located within ATAK. When the area the model is located in is viewed, the model will begin to load at various zoom levels.
Imported models are listed in the models section within ATAK’s layer manager and can be toggled. It’s worth noting that local and remote models are indistinguishable here, so you may accidentally generate network traffic when you do not intend to.
At the web server, GET requests from the EUD will be visible and follow a predictable pattern: First the tileset is queried, then the top “leaf” levels are fetched, followed by root.glb and then mid zoom levels as a user explores into the model.
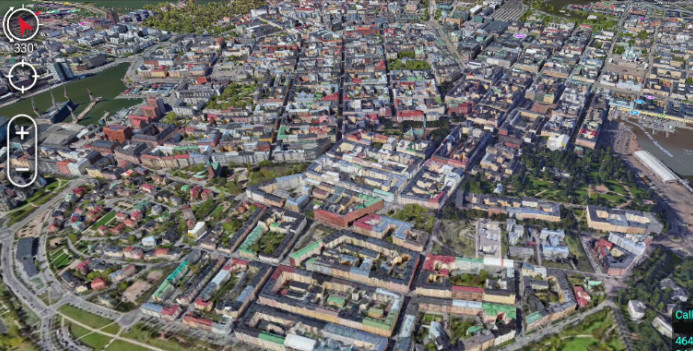
Case Study – Third Party 3D Tiles
Tiles which are already geographically referenced, like Google Maps 3D Tiles, require less processing to function as a mapping layer in ATAK.
For this capability demo, we streamed third-party hosted 3D Tiles using the BLOSM plugin in Blender, which can export directly to GLB.
The GLB to 3D tiles pipeline is run with the following command:
python3 GLB-to-3DT.py data.glb ./output/ --bbox 60.15184 24.91442 60.17965 24.96386 --compress With a Geo-referenced GLB source like this, there is no need to declare latitude and longitude explicitly, as the bounding box used in BLOSM is passed directly to the pipeline. The same approach applies regardless of where the 3D tiles were sourced; as long as you have a valid bounding box, the pipeline handles the rest.
This method uses open source tools throughout.
To use commercial map tiles as a mapping source, you will likely need an API key for the vendor, and care should be taken to respect the Terms of Service, which may prohibit data scraping and hosting. Check if unsure.
Case Study – LiDAR scan for a mine
The next model is a LiDAR scan captured on an exercise lane at the Tough Stump Rodeo 2026.
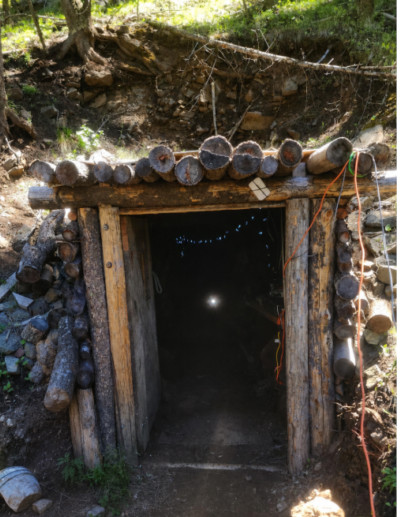
Part of the challenge for the lane was to map the tunnel and communicate it back to a remote HQ. This was not easy given the very limited bandwidth. It was clear that edge processing would be needed, so only key information like dimensions and some highly compressed video could be shared, not all the raw scan data.
The LiDAR scan was generated using the Cleo Robotics Dronut, which exported to the open e57 point cloud format. A point cloud contains an extreme amount of information, which makes it a very large file.
Point cloud data needs to be meshed to make a model with a process known as triangulation, which involves noise removal and smoothing of surfaces. This was especially challenging given the old mine’s rough earth walls and supporting beams.
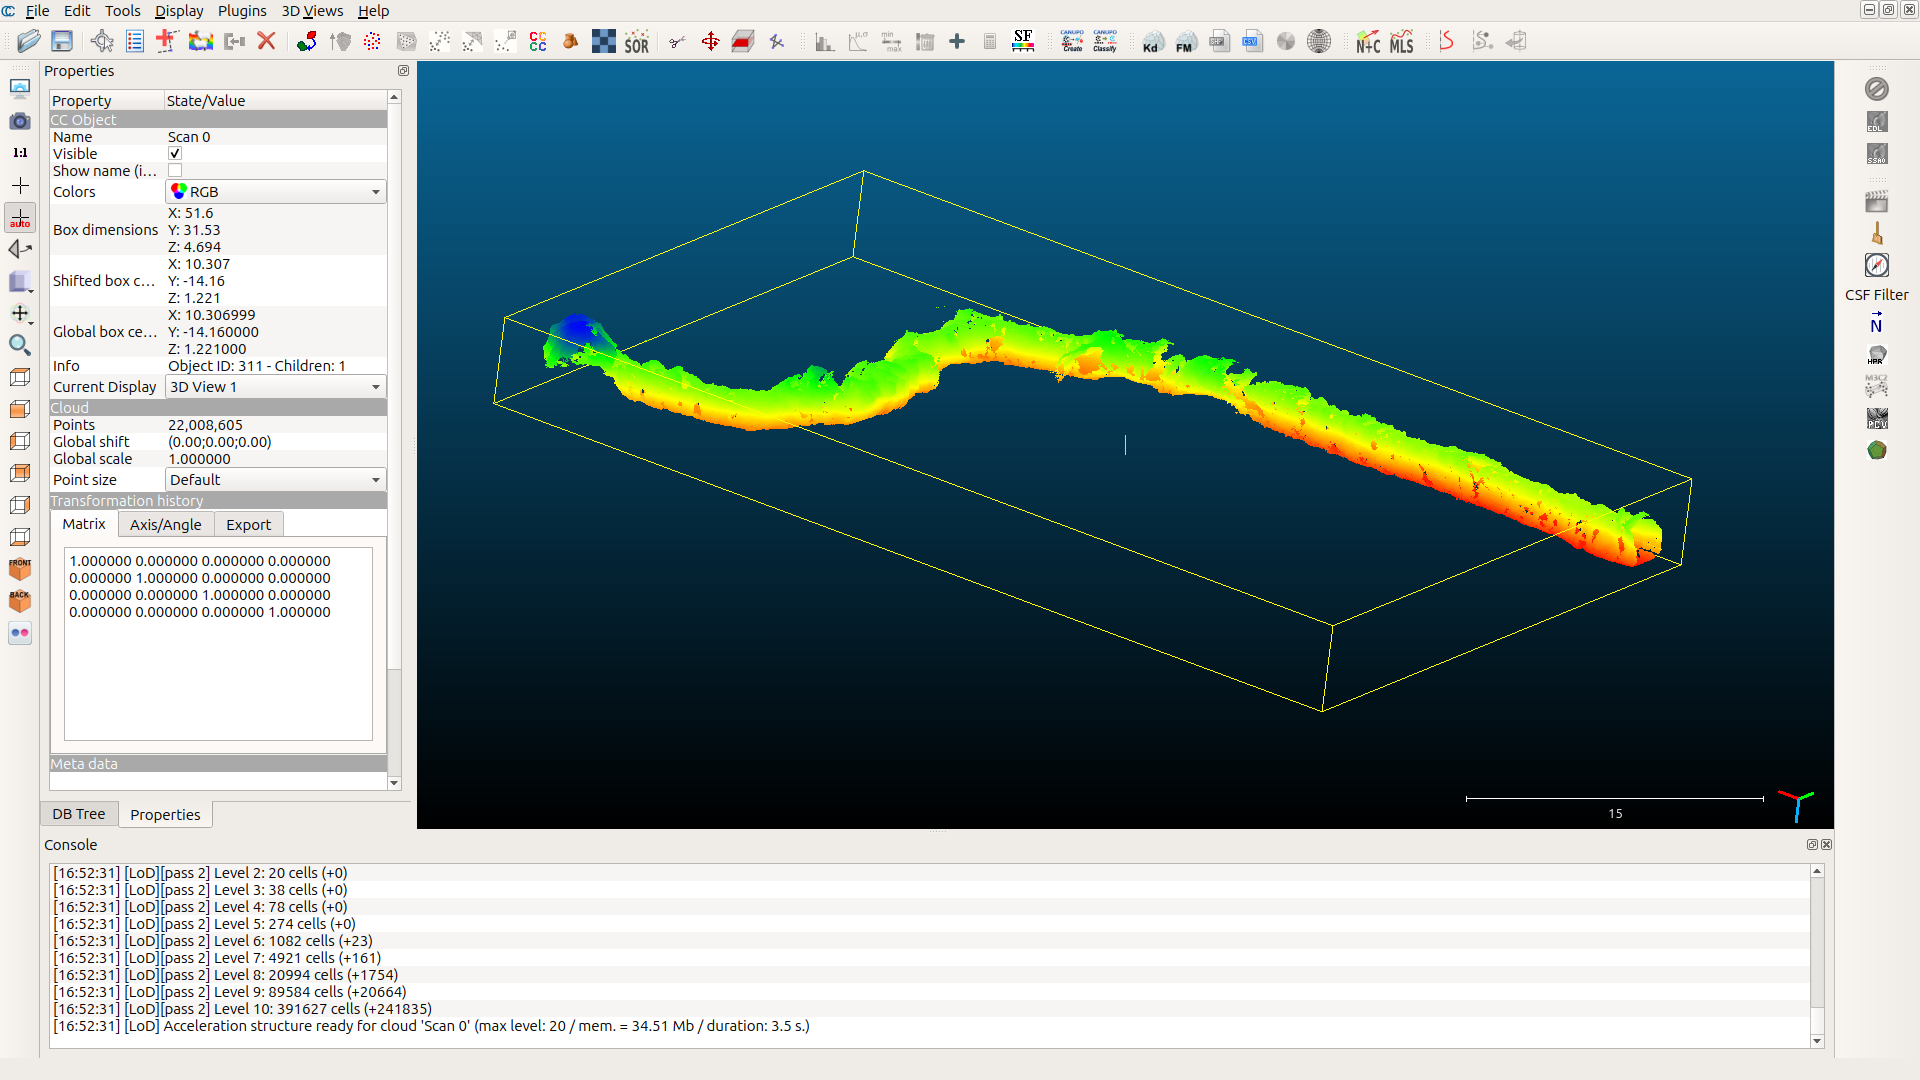
When working with point cloud data, the first step is to visualise the point cloud in a tool such as CloudCompare, developed by Daniel Girardeau-Montaut. Visualising the data first allows you to assess its quality before committing time and compute to processing.
Point cloud data commonly contains noise and outliers, and LiDAR scans in particular can carry multiple returns per pulse, dust, or secondary surfaces that add unwanted complexity to the dataset. By assessing the data upfront and stripping out spurious points and unnecessary returns, you can significantly reduce processing overhead and improve the quality of the final mesh.
Once the point cloud has been assessed and cleaned, it can be meshed. There are several ways to approach this, depending on your environment and requirements.
For users who prefer a graphical interface, tools like Blender and CloudCompare allow the user to be hands-on throughout each stage of the process. The trade-off is scalability, GUI-based workflows are manual by nature, well suited to one-off conversions or exploratory work, but difficult to integrate into an automated pipeline.
For users operating at the edge where time, attention, and compute are all limited, an automated pipeline that runs in the background offers a clear advantage, freeing the operator to focus on other tasks while processing runs unattended.
After evaluating a range of tools, Open3D SDK was selected for meshing the mine dataset. Open3D operates without a GUI and supports two meshing algorithms: Poisson surface reconstruction, which produces smooth, watertight meshes suited to enclosed environments, and Ball Pivoting, which stays closer to the raw point data and preserves sharper detail but can struggle with uneven point density.
The script used for processing the mine data is available below. Features that also made it into the script included flexibility with declaring the max number of points to be processed, as we encountered issues with integer limits.
These variables can be adjusted by the user to find good variables to get the best results from their point cloud data with the hardware i.e. LiDAR camera, processors, and time and network restrictions.
For reference, the point cloud data used for this model is 243MB and contains no fewer than 22e6 points.
The low-resolution model used the following command:
python e57_to_mesh_glb.py input.e57 output.glb --max-points 500000 --depth 8 --density-pct 10 The process was completed on a laptop with an Intel Core i7-1255U CPU on battery power within a minute. The script has been built to use CPU only to cater for the large number of edge devices which have no or limited access to a GPU.
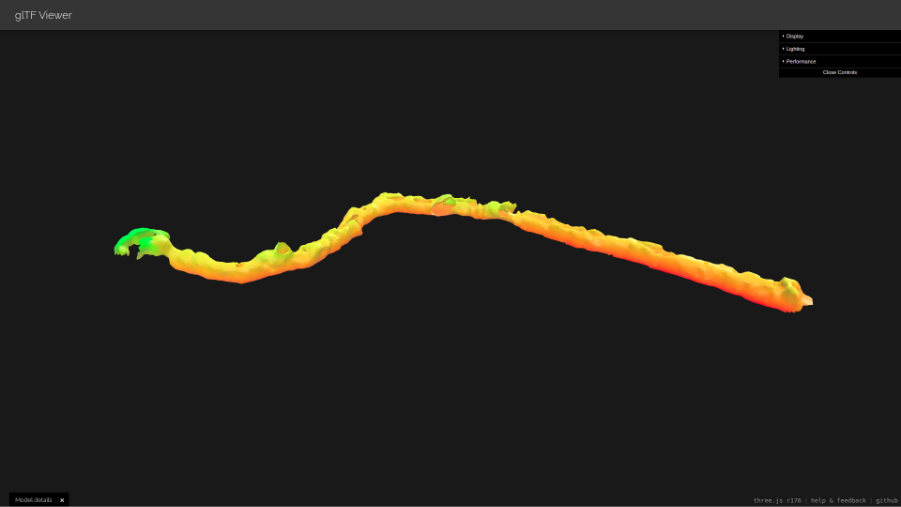
The GLB model shown above was generated using the lightweight processing settings, tuned to run within the constraints of edge hardware. The GLB model is 742kB in size, a large decrease from the original scan. Whilst the reduced point count and lower Poisson depth introduce some gaps in the surface geometry, particularly in areas of lower scan density, the model still conveys a clear and usable representation of the mine’s layout.
For the tactical user, this level of fidelity is sufficient to support meaningful pre-mission planning. The tunnel structure, directional changes, and spatial dimensions of the environment are all discernible, allowing operators to identify key decision points such as choke points, junctions, and viable radio relay positions before entering the environment.
The ability to generate even a lightweight 3D model at the edge, without dependence on cloud infrastructure or high-end workstations, represents a significant capability step. A basic understanding of an underground environment, derived from autonomous scan data streamed over a MANET network, can meaningfully reduce the unknowns facing a team preparing to operate in a GPS-denied, comms-constrained space.
A high-resolution model was also created. The command used for the script was as follows:
python3 e57_to_mesh_glb.py scan_fixed.e57 output.glb --max-points 22000000 --depth 12 --normals-nn 30 --density-pct 5 This was processed on a server with a higher spec, including an Intel Xeon Silver 4116 CPU. The process to convert the e57 to a mesh GLB took just under two hours. The GLB produced from the script has a file size of 286MB, significantly larger than the lower resolution model!
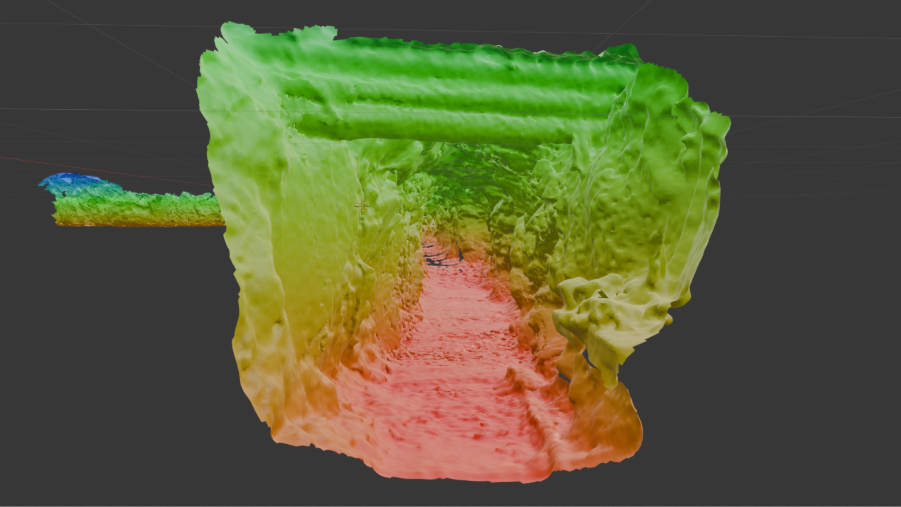
The higher resolution model captures the interiors of the mine to a much finer degree of detail, with overhead supports and the carved out walls being visible. This detail will present a lifelike representation of the mine and allow operators to do a virtual walkthrough and identify physical obstacles such as debris and the ground underfoot.
Comparing the two models, we can see that the overall geometry of the model is consistent between both, with the layout and structural features being present. The higher resolution model has a greater level of detail, retaining the full extent of the mine shaft where the lower resolution model loses definition towards the extremities.
The GLB to 3D tiles we used were produced in the following way to produce the tiles and place them appropriately:
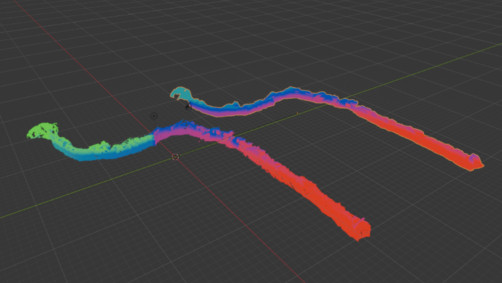
python3 GLB-to-3DT.py mine-scan-compressed.glb tiles/ --lat 45.49836 --lon -112.04337 --hag 50 --ground-snap --compress --centre --height-ramp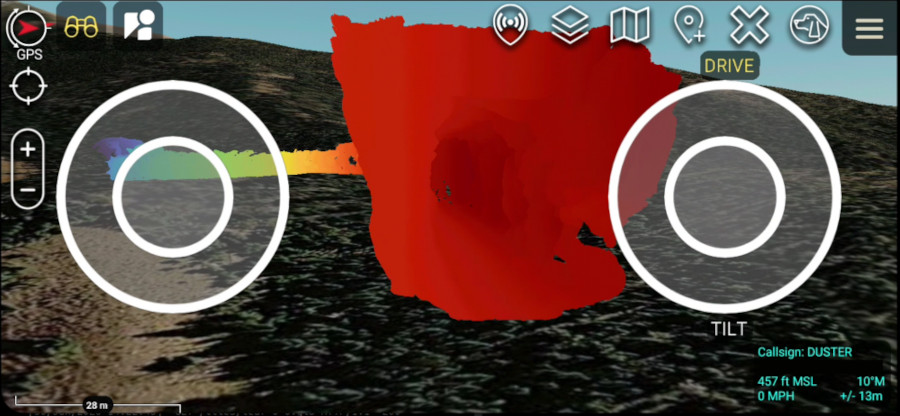
The –height-ramp flag has been used in this command to aid in visualising the uncoloured LiDAR scan.
Scripts
The following scripts have been published to assist with data processing. All are available for free to advance progress in this exciting space, which we stand to exploit with our 3D engine. If you find any of these helpful, please consider giving them a star on Github 🙂
Link: https://github.com/Cloud-RF/3D-tiles-blog
LiDAR e57 to GLB script
Converts an e57 standard LiDAR point cloud file to a GLB model (Triangulation)
Link: https://github.com/Cloud-RF/3D-tiles-blog/tree/main/e57toGLB
GLB to 3D Tiles
Converts a GLB model to OGC 3D Tiles for use with ATAK.
Link: https://github.com/Cloud-RF/3D-tiles-blog/tree/main/GLBto3DT
3D Tunnel builder
Developed as a contingency tool to make a clean model using limited information in the event point cloud data is unavailable.
Link: https://github.com/Cloud-RF/3D-tiles-blog/tree/main/Tunnel-builder
Demo data
These demo files work with ATAK.
3D Tiles for an urban tunnel:
https://github.com/Cloud-RF/3D-tiles-blog/tree/main/GLBto3DT/output
Mine model with Draco compression:
https://github.com/Cloud-RF/3D-tiles-blog/blob/main/files/mine-scan-compressed.glb
Summary
Through this journey into new standards, we have implemented our own OGC 3D Tiles 1.1 endpoint for terrain and clutter, which dynamically renders terrain and obstacles from local data. This takes us from 2.5D to true 3D without dependencies on third party providers or a network connection.
Initially, the endpoint will be used in our next cross platform interface for RF planning, but as an OGC standards based layer, it can be used on third party apps.
The two trending open standards which make this possible are glTF for rich textured models and 3D Tiles for streaming large models to clients.
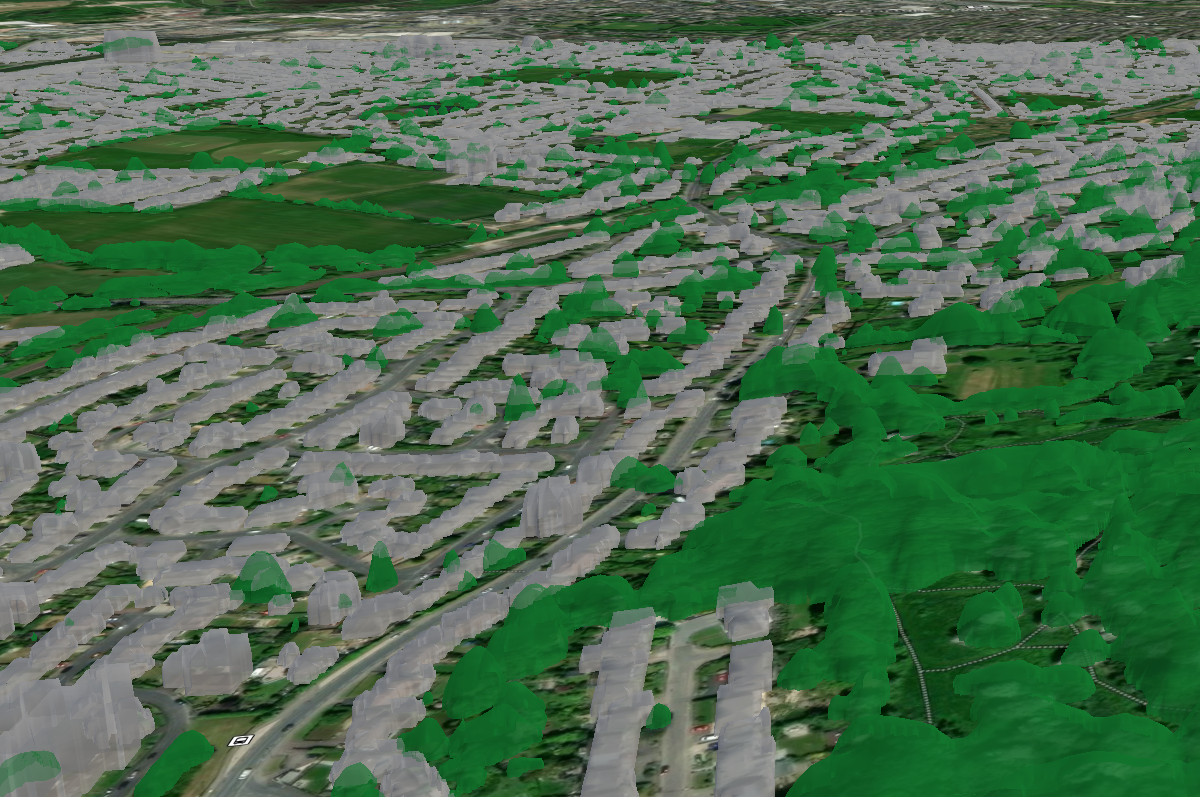
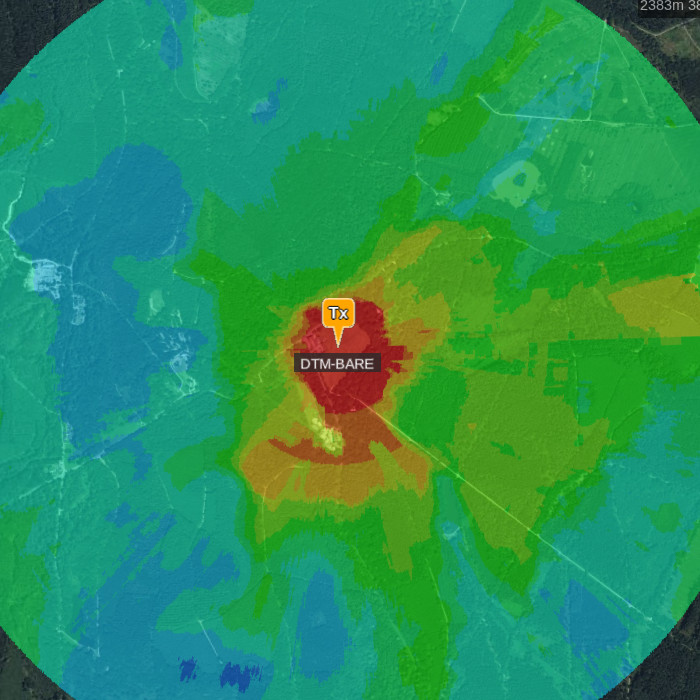
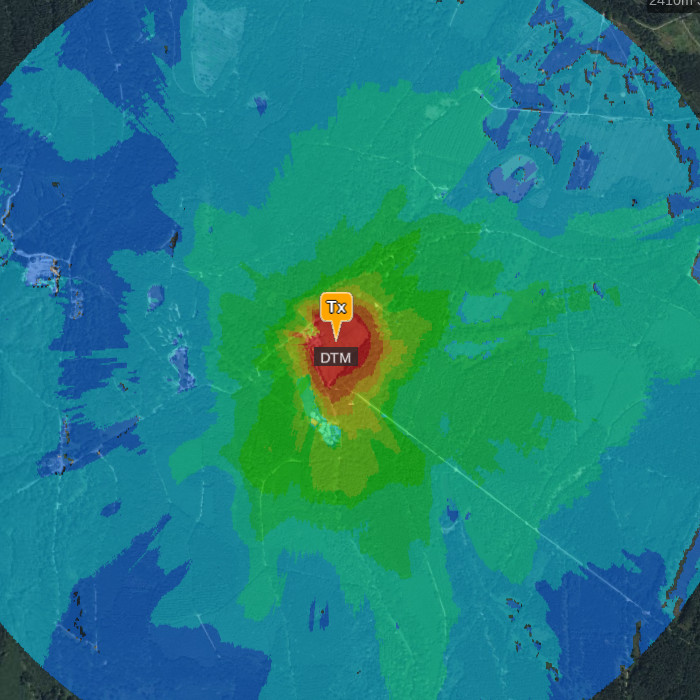
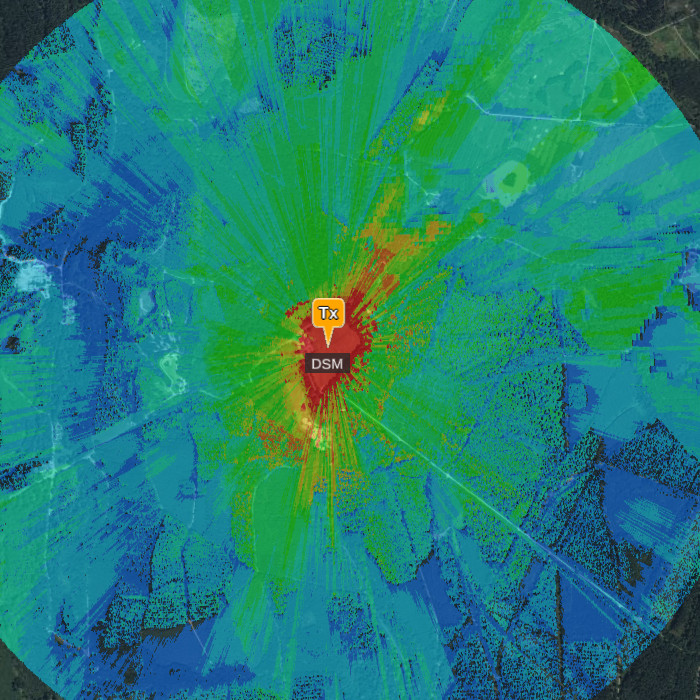
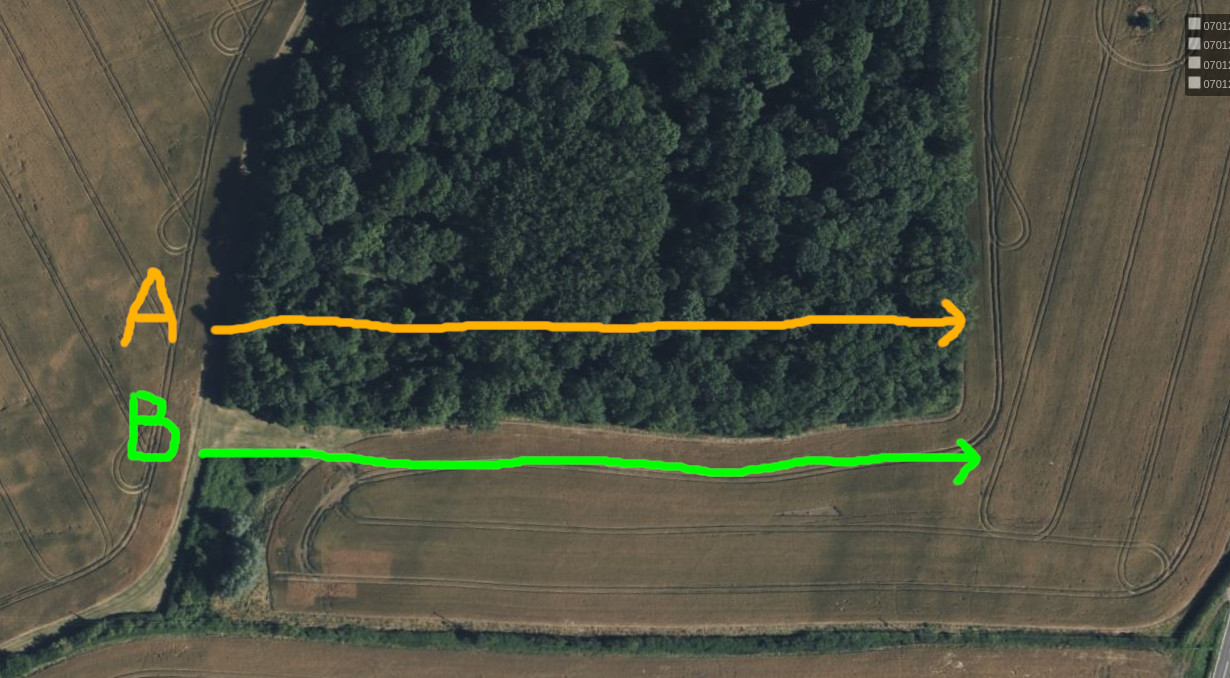
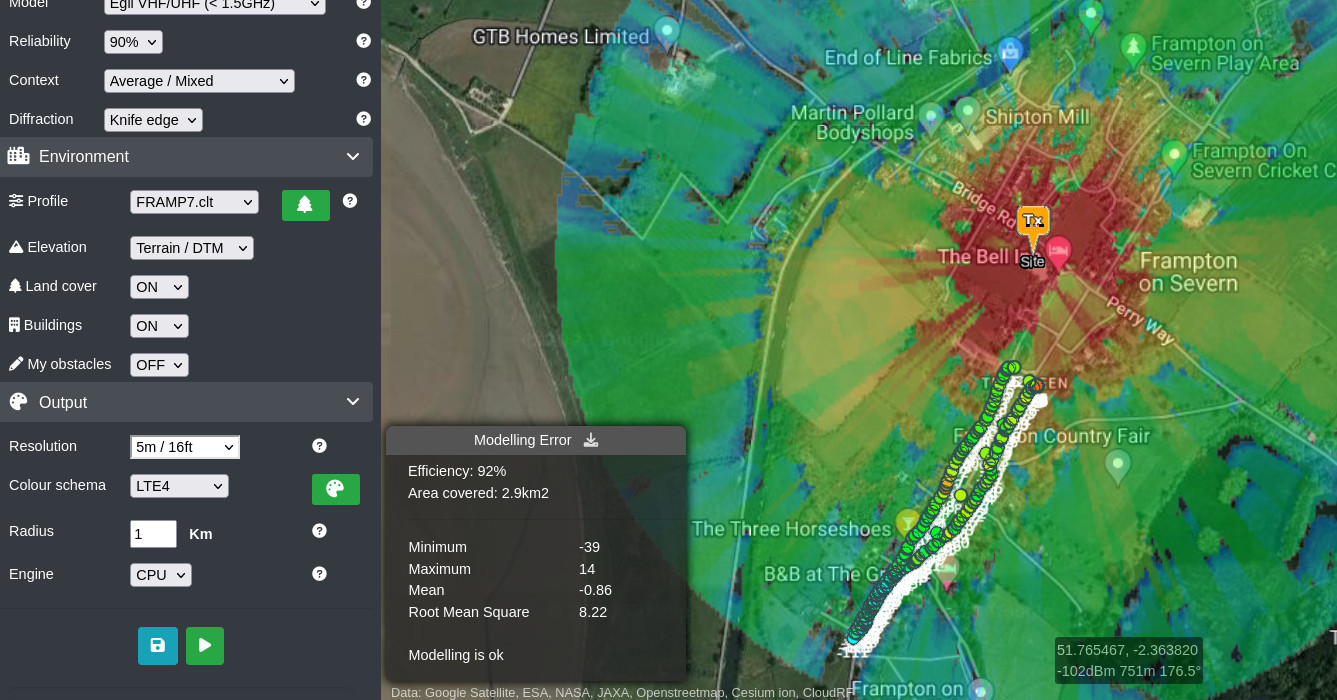

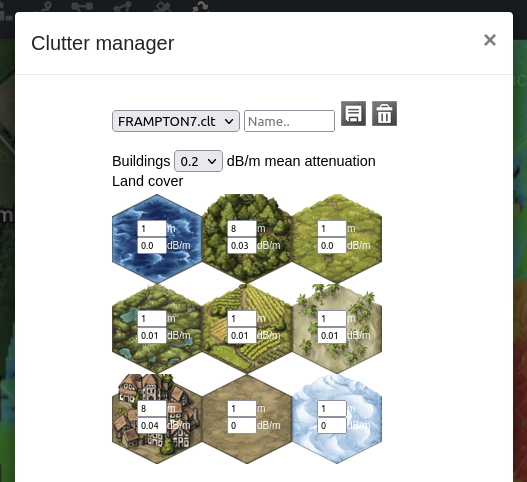


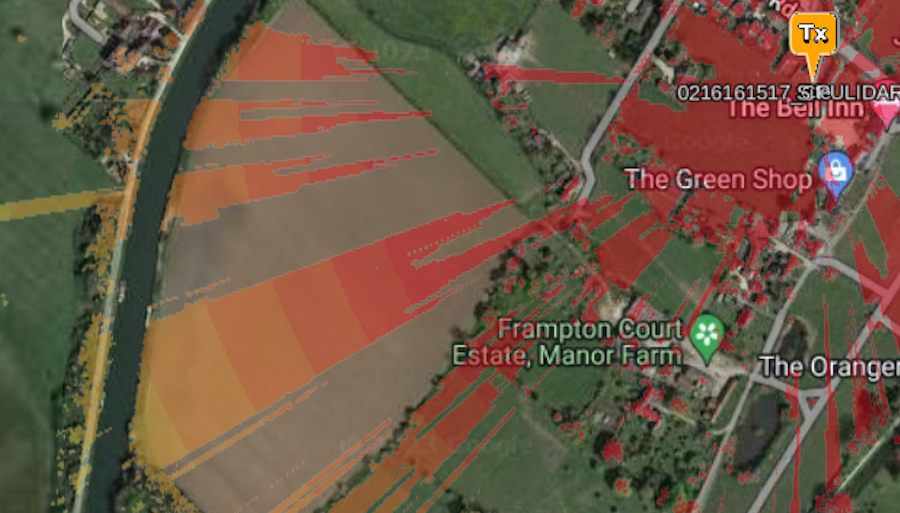

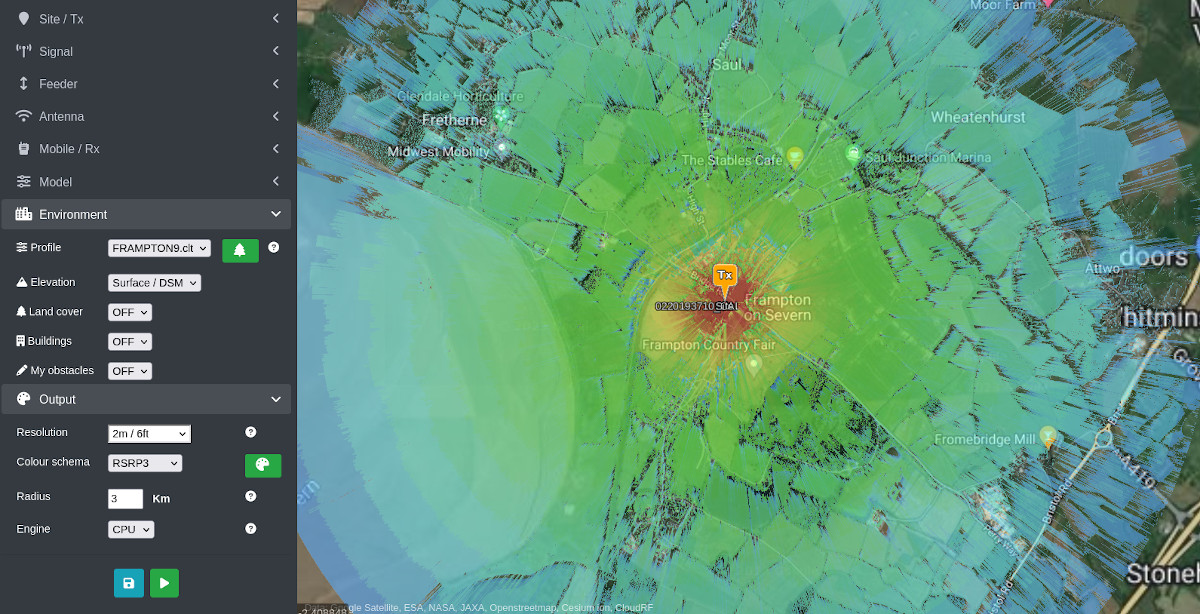
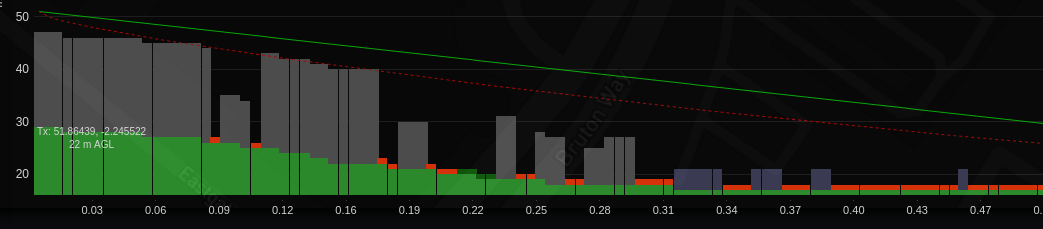


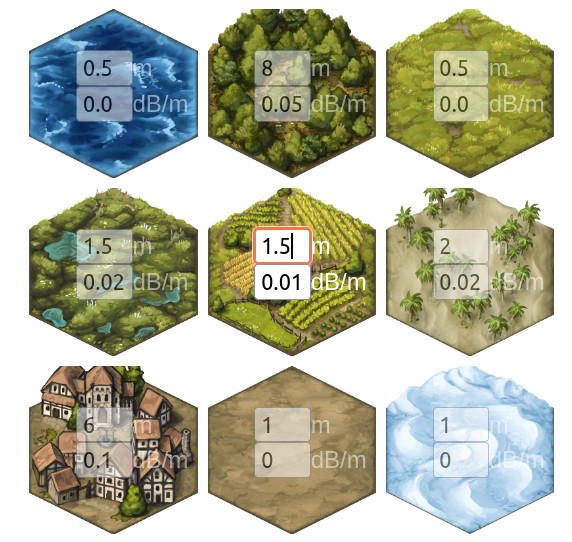

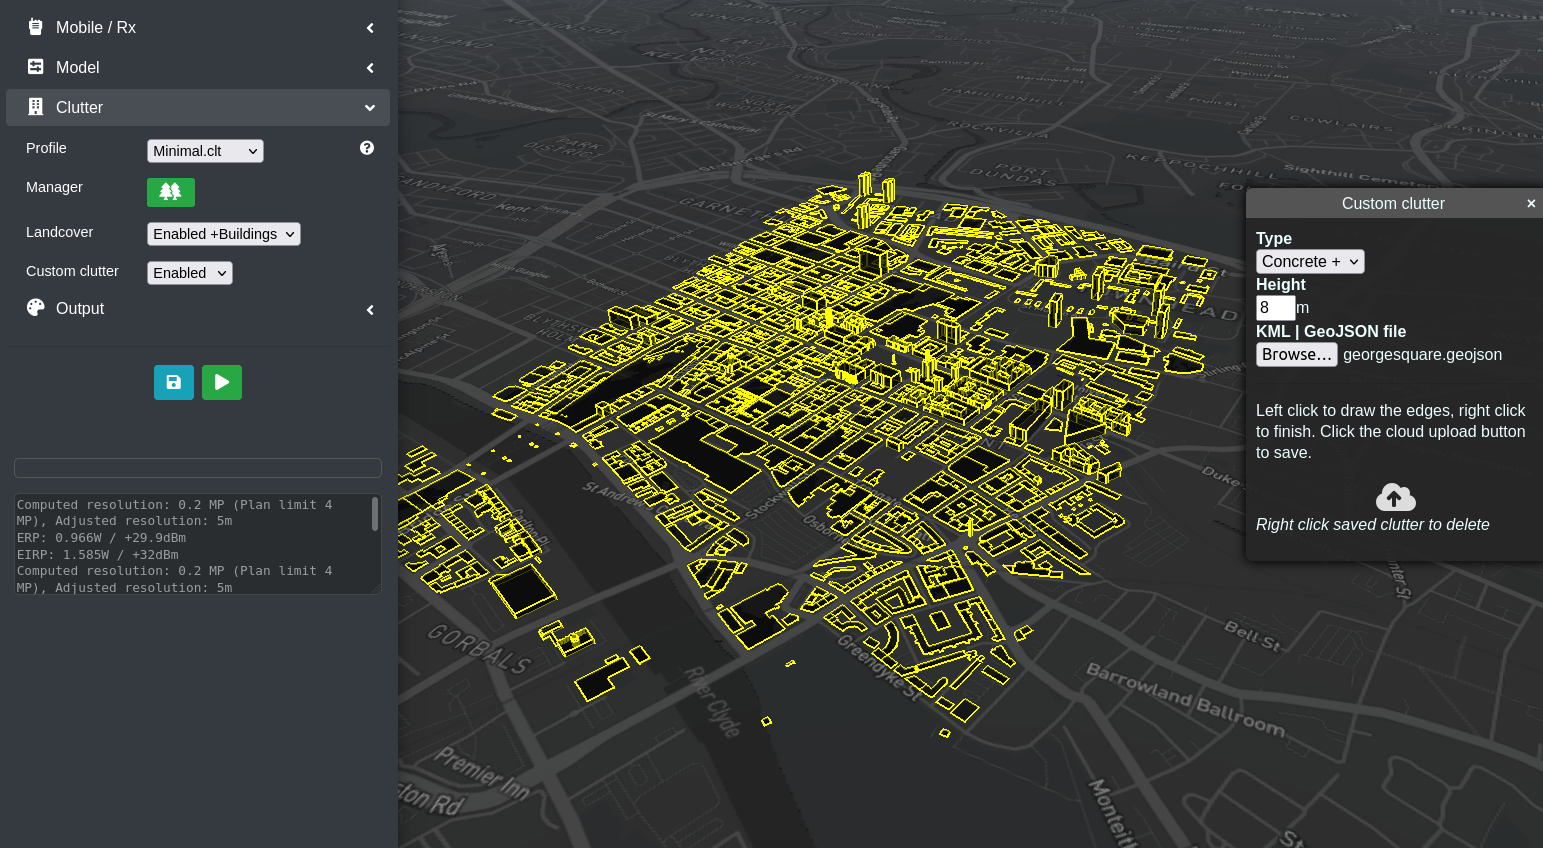
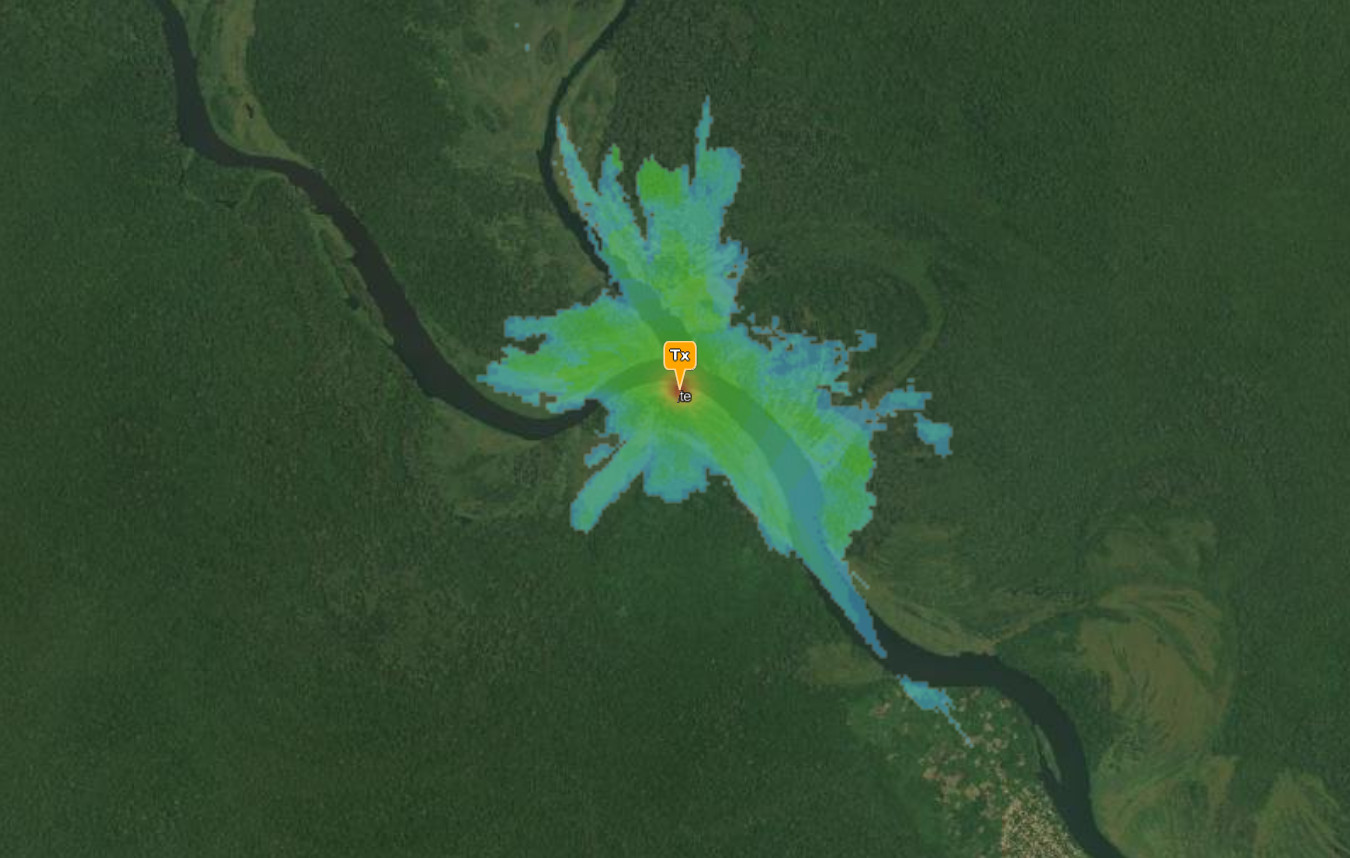

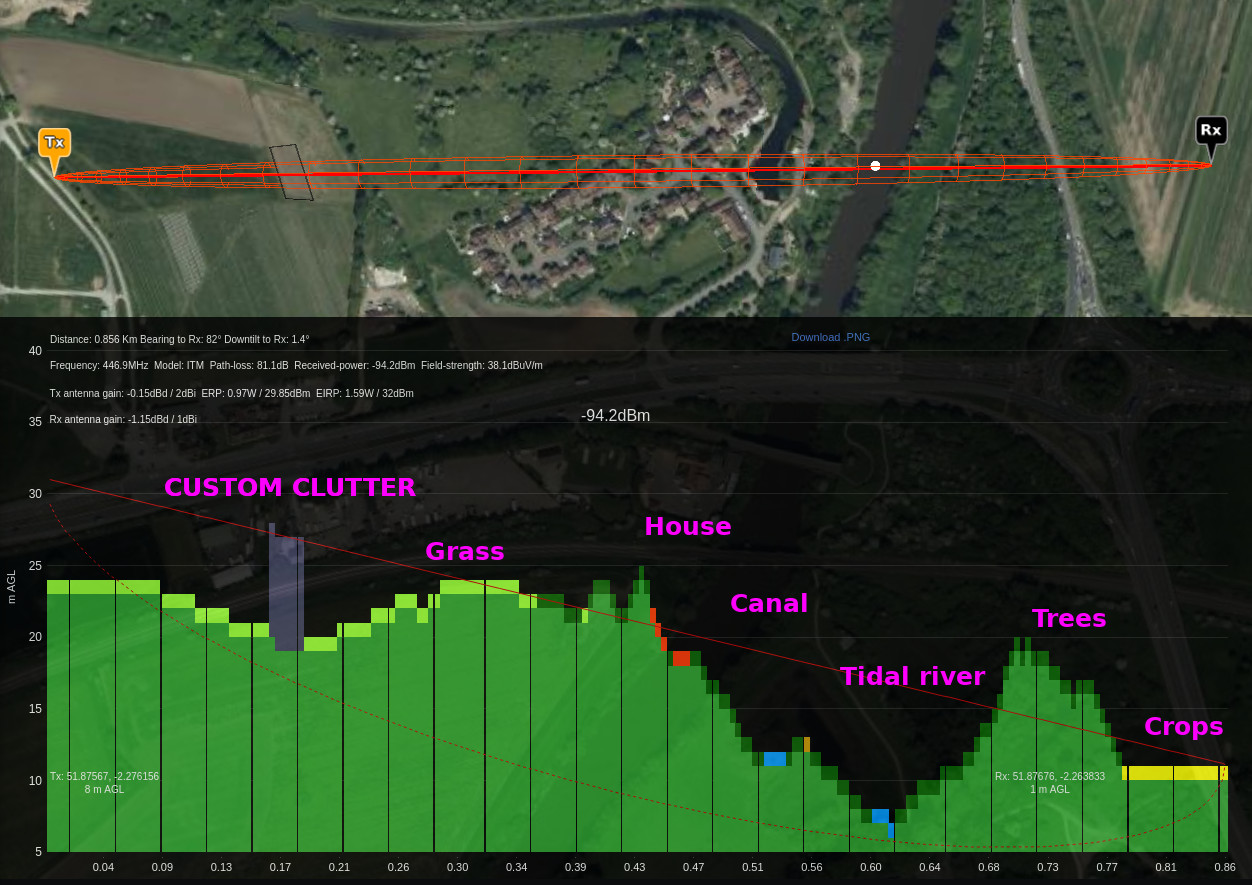
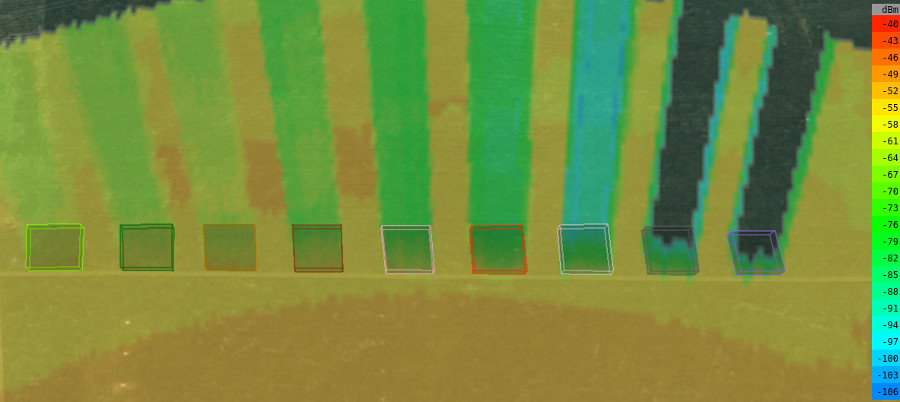
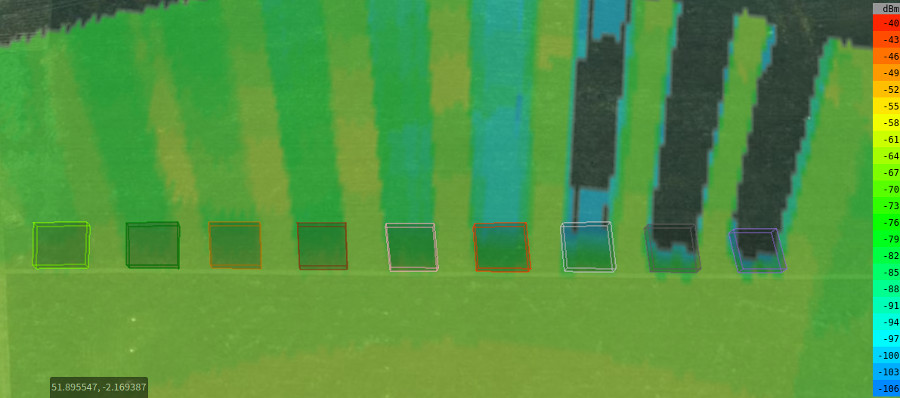
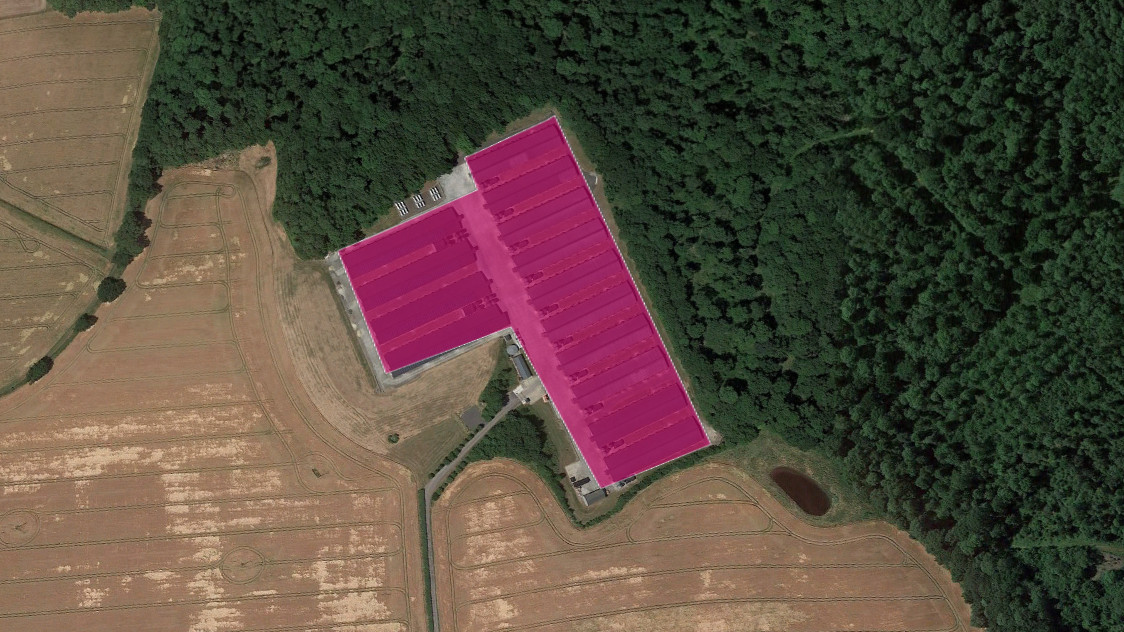
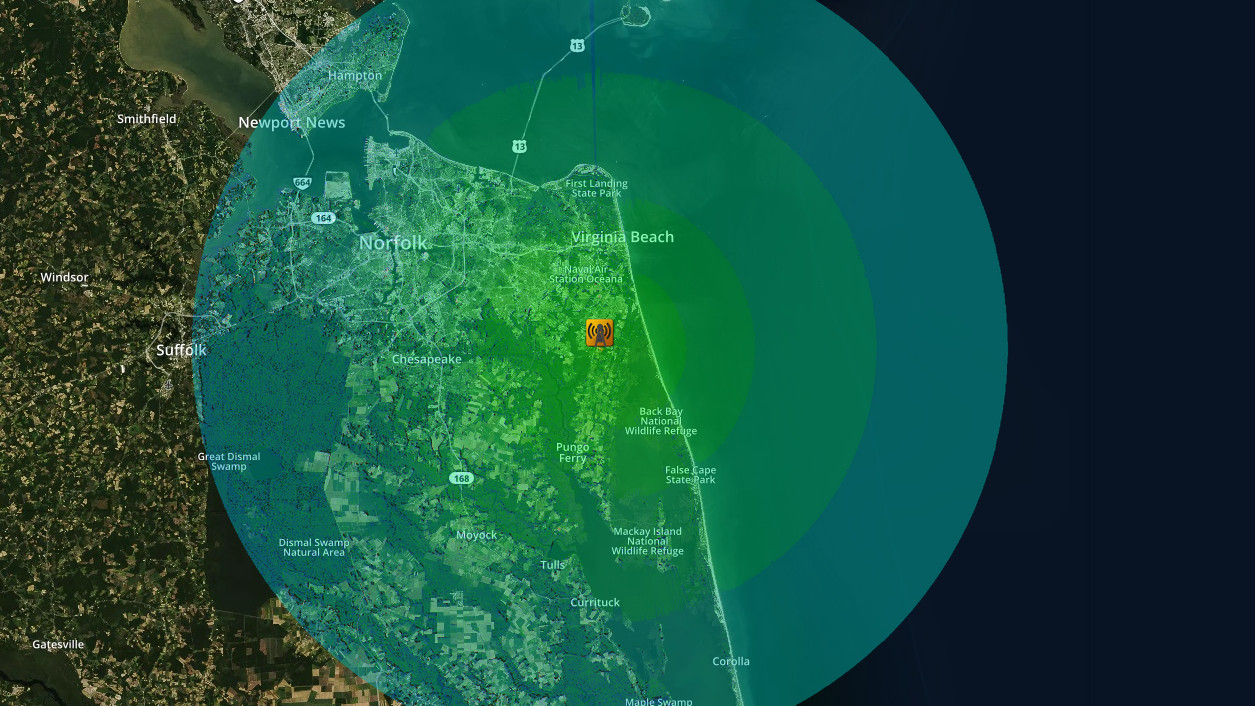
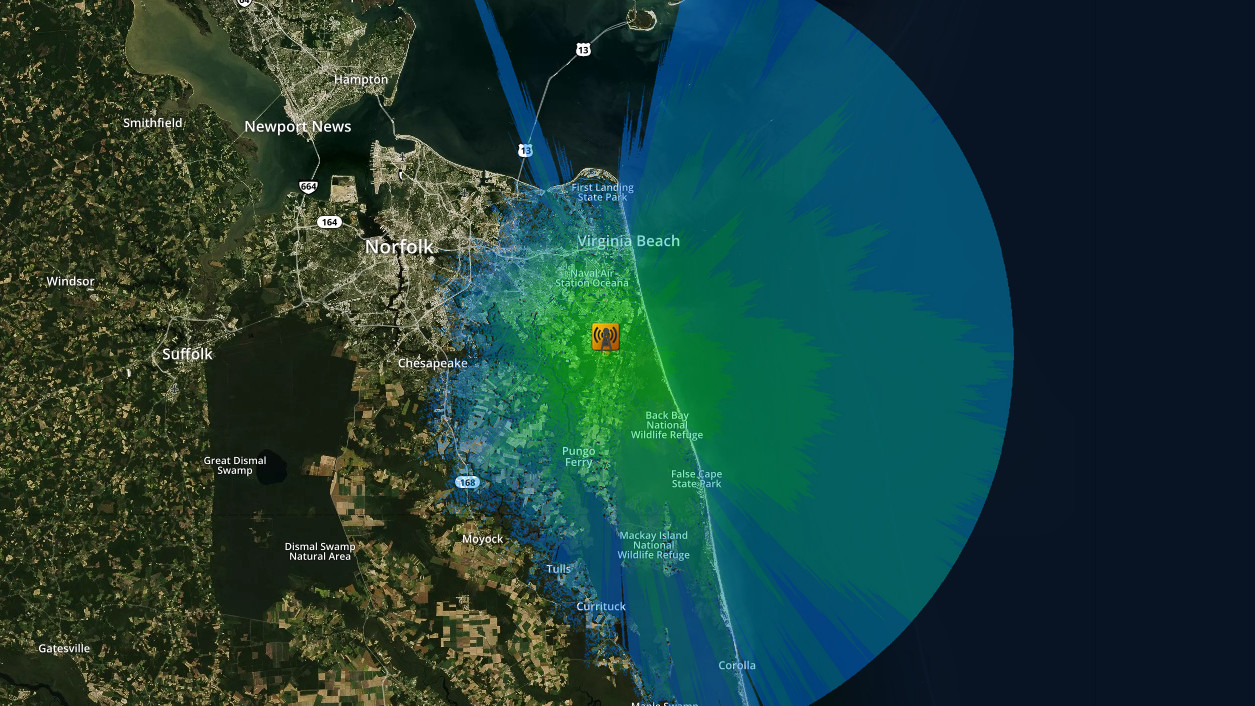
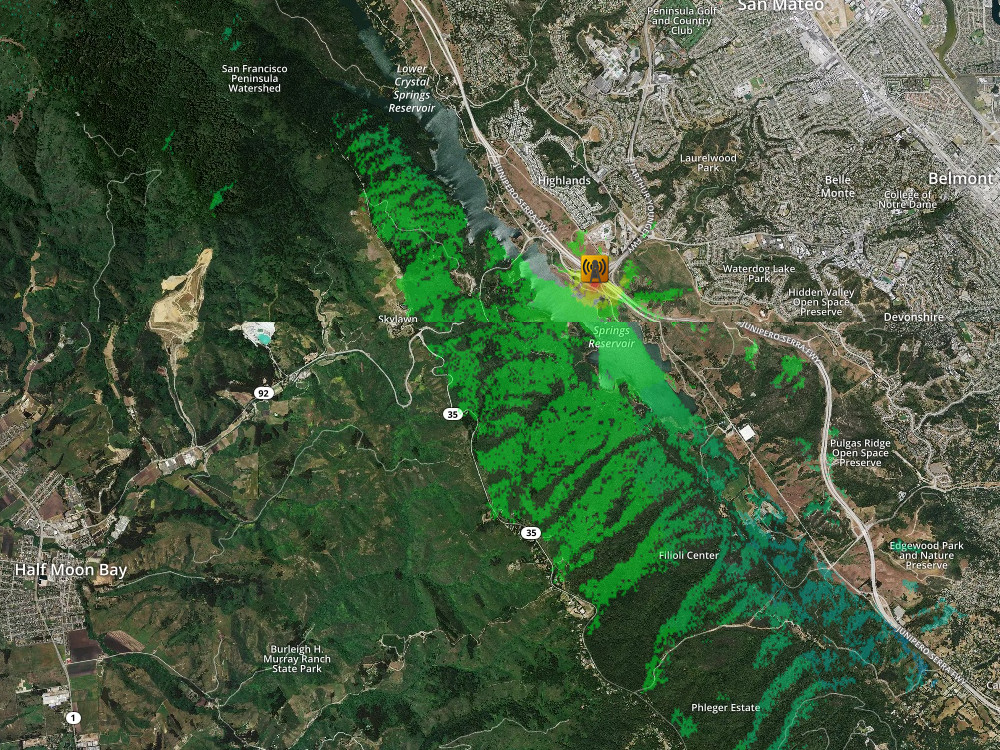
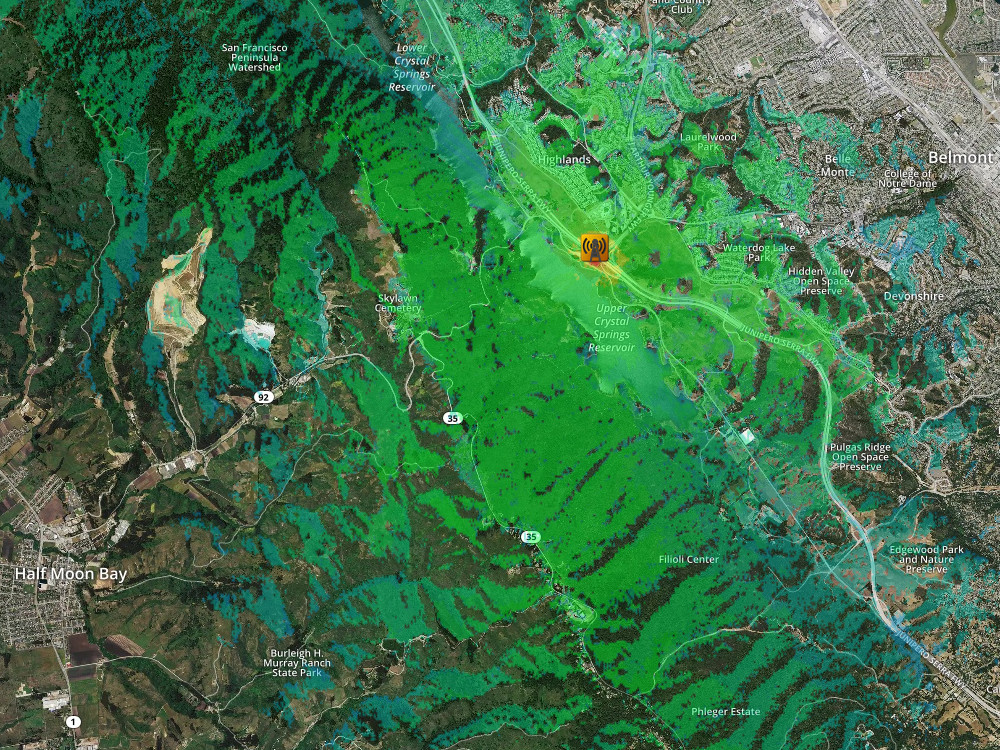
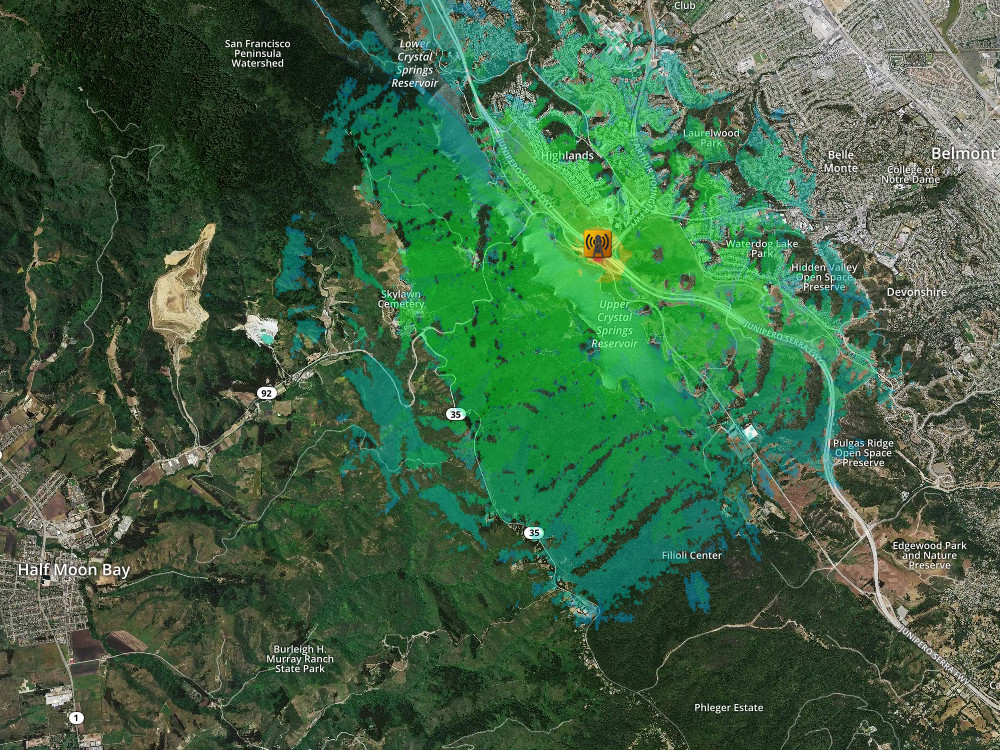
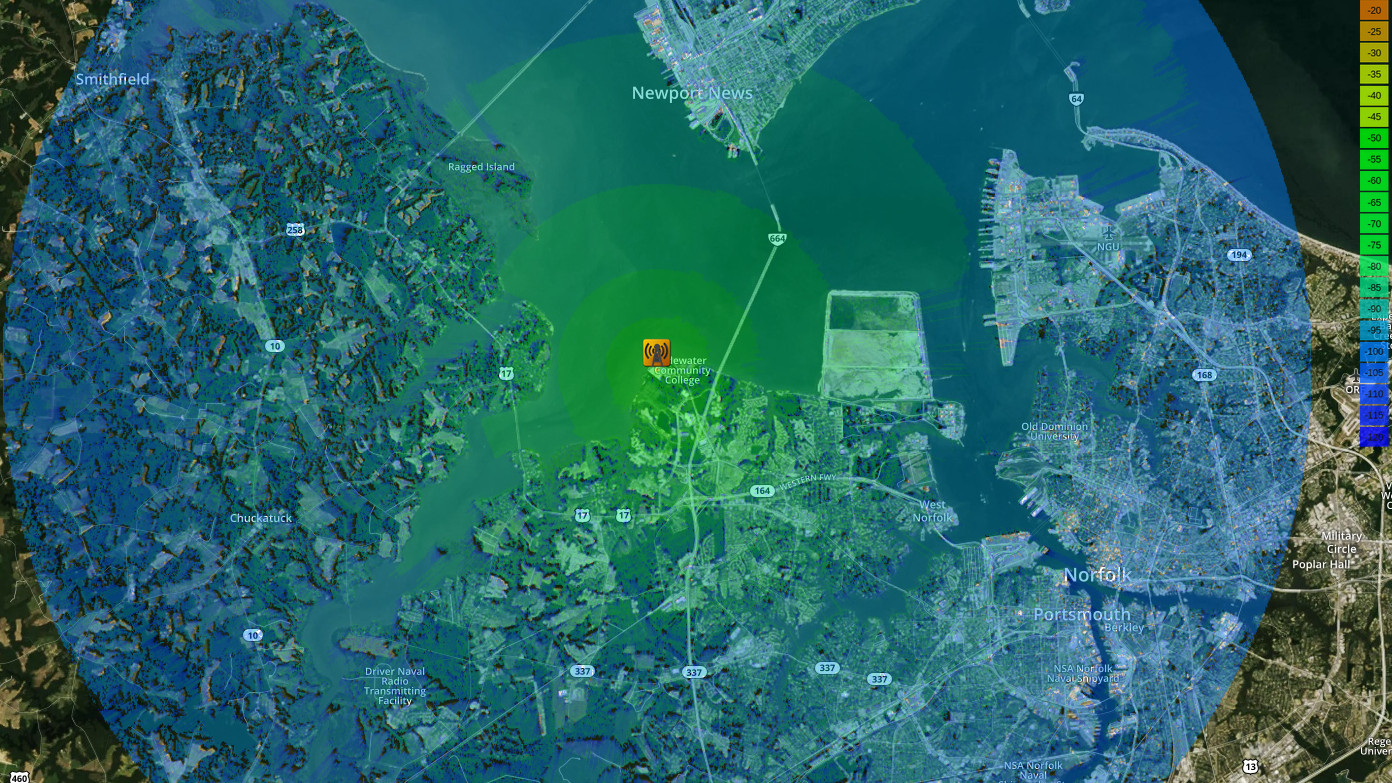
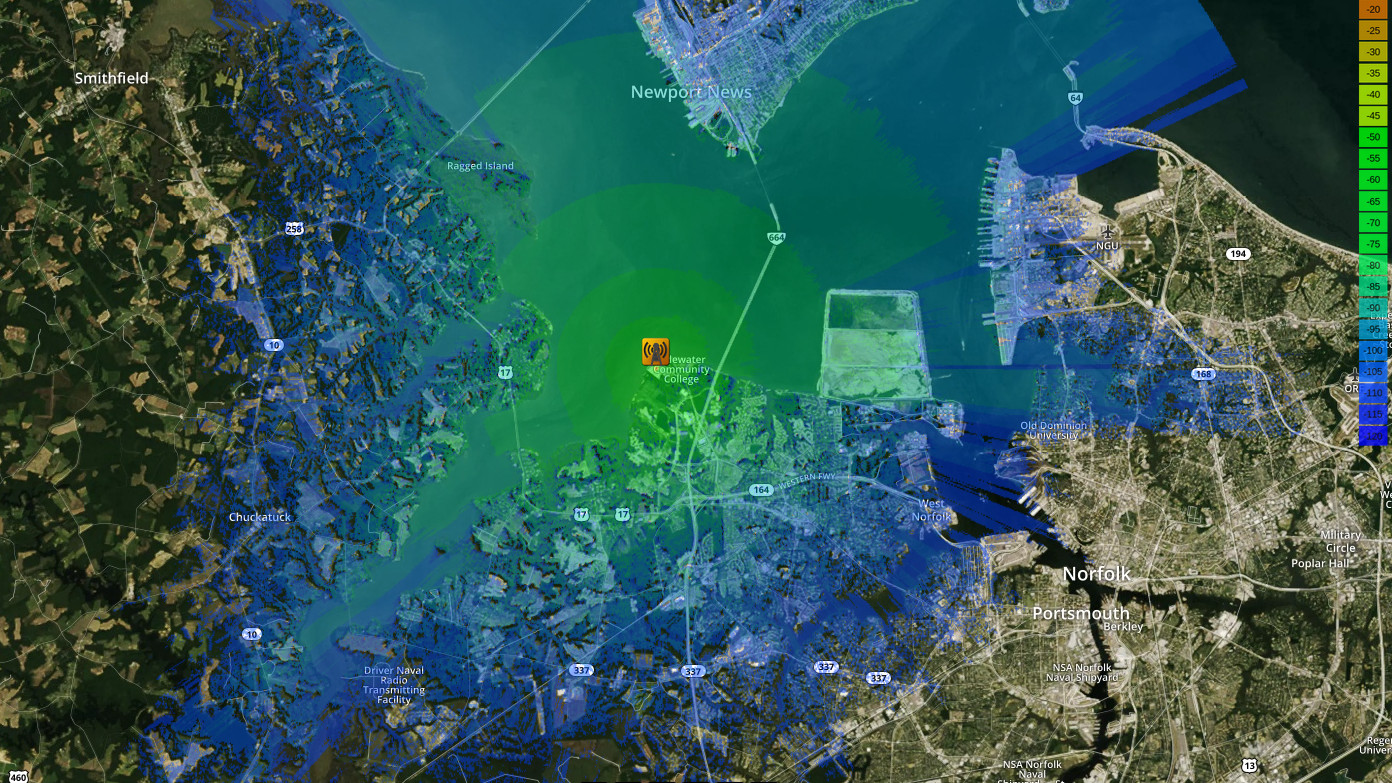
 Land Cover or ‘clutter’ data describes obstacles on the earth’s surface a radio wave will have to negotiate like trees or buildings. The Land cover data is layered on top of the terrain data which can be either a smooth(er) Digital Terrain Model (DTM) or a rougher ground-with-clutter ‘Digital Surface Model’ (DSM) . For DTM and DSM this will allow you to simulate attenuation from a forest or city where it might not otherwise be represented in the data resulting in much more accurate results. It also means you can enhance basic coarse terrain data with fresh high resolution land cover to reflect recent construction developments.
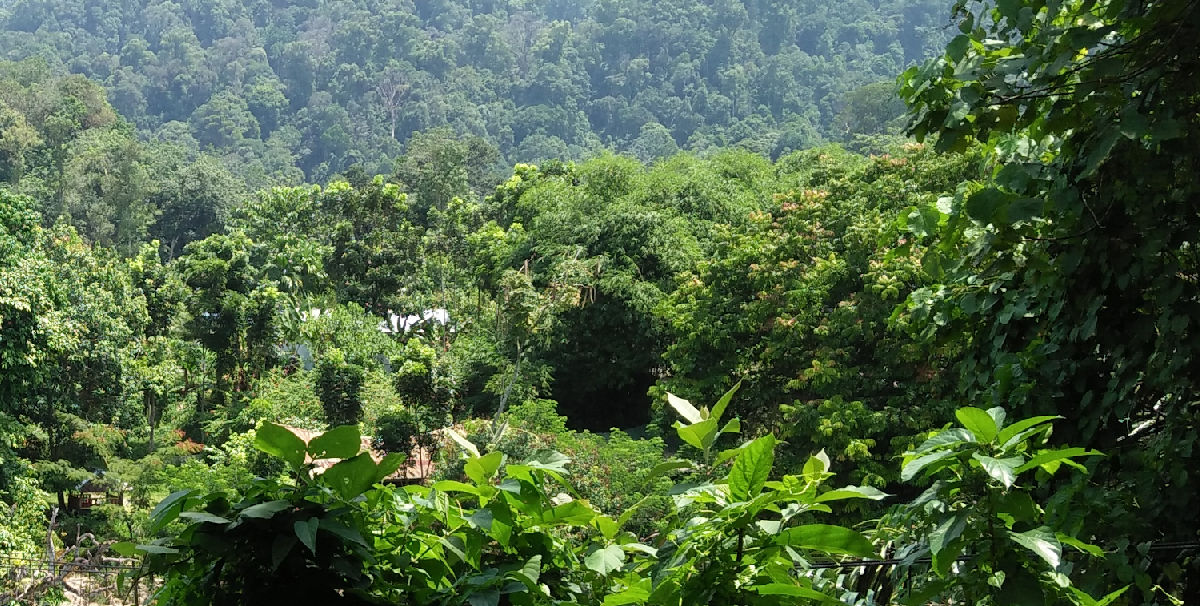
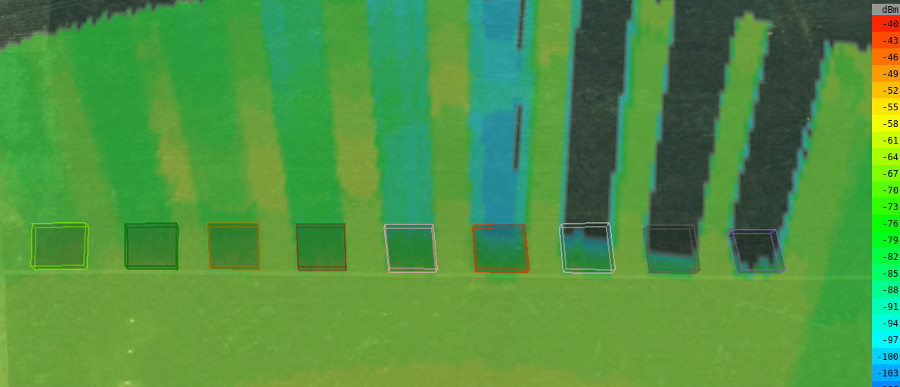
 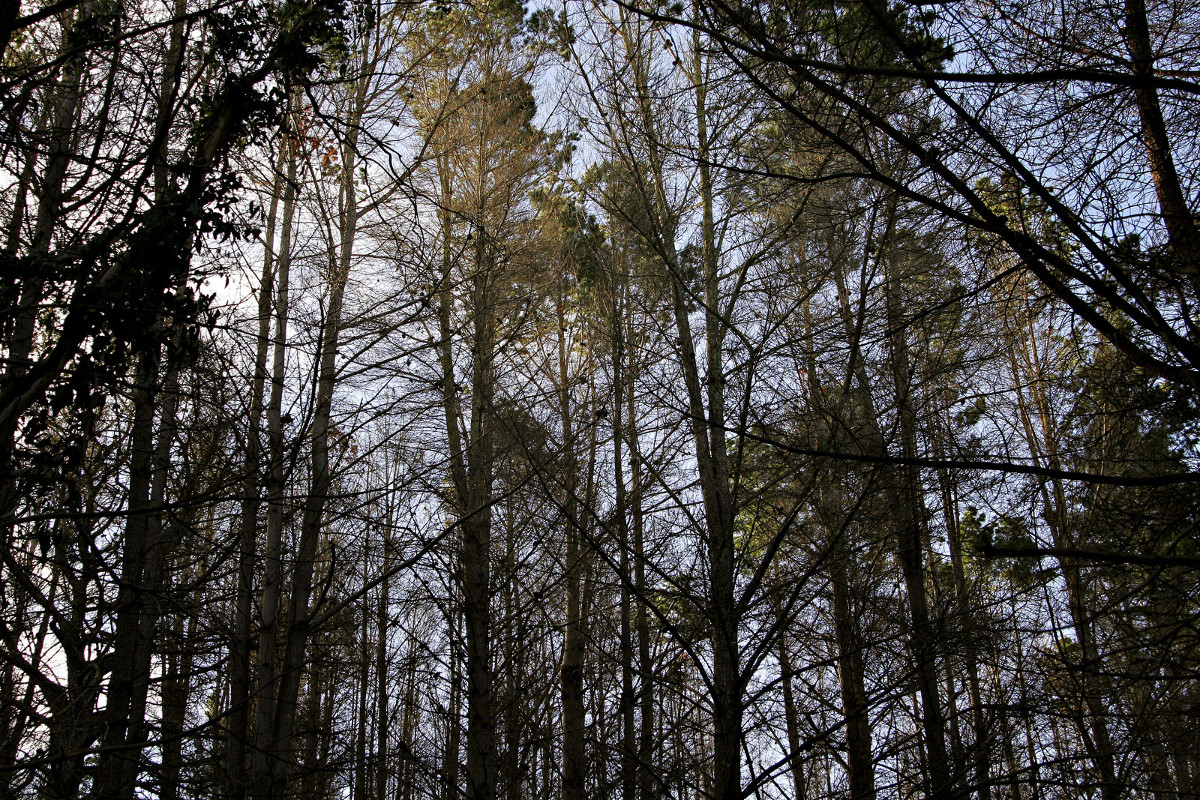 Trees attenuate differently with dense coniferous pine forests attenuating the most. An ITU standard, ITU-R P.833-7 “Attenuation in Vegetation” exists to describe the impact of a forest of different signals. There have been many academic studies into this subject but the summary of this standard for a mixed deciduous/coniferous forest is as follows:
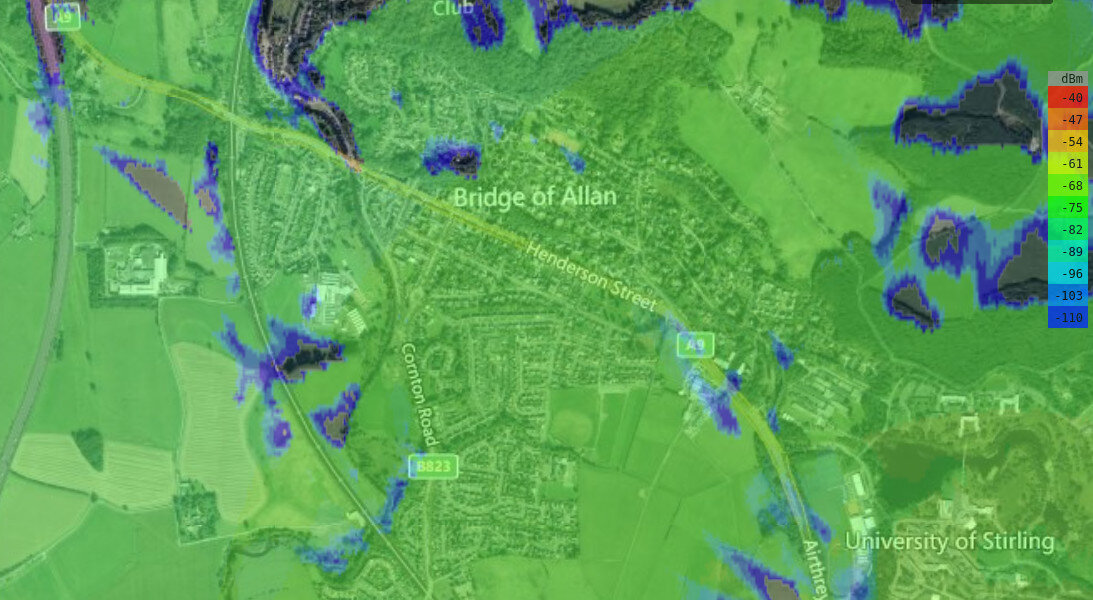
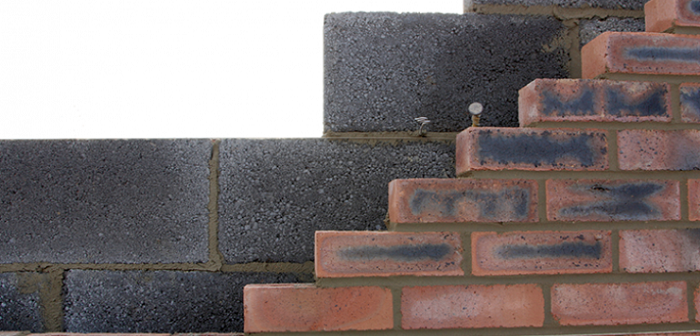
 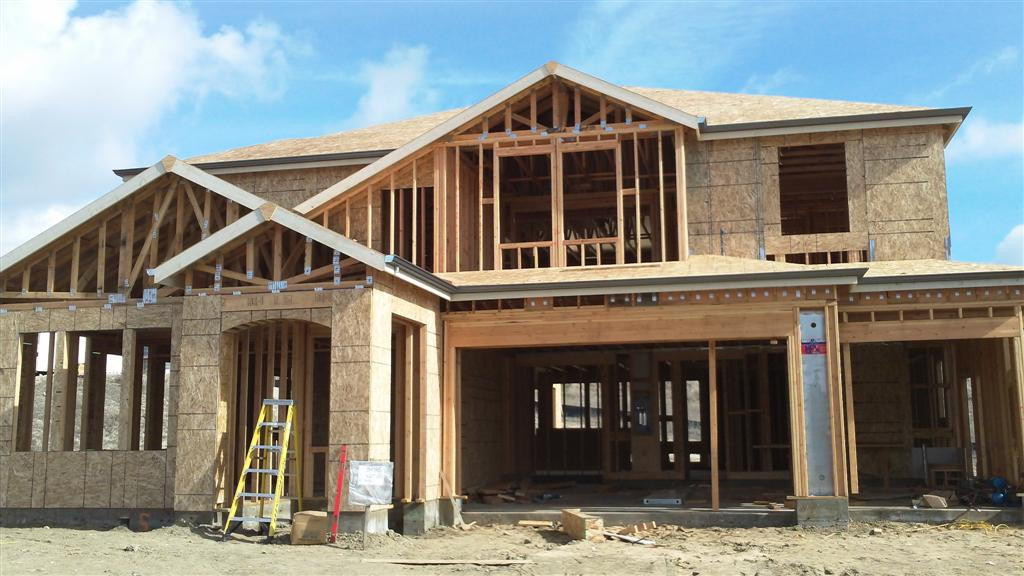 Man-made buildings are even less predictable due to the variety in size, density and materials used. Many studies have been conducted into building attenuation but they are region specific due to construction materials and designs. A good reference is a
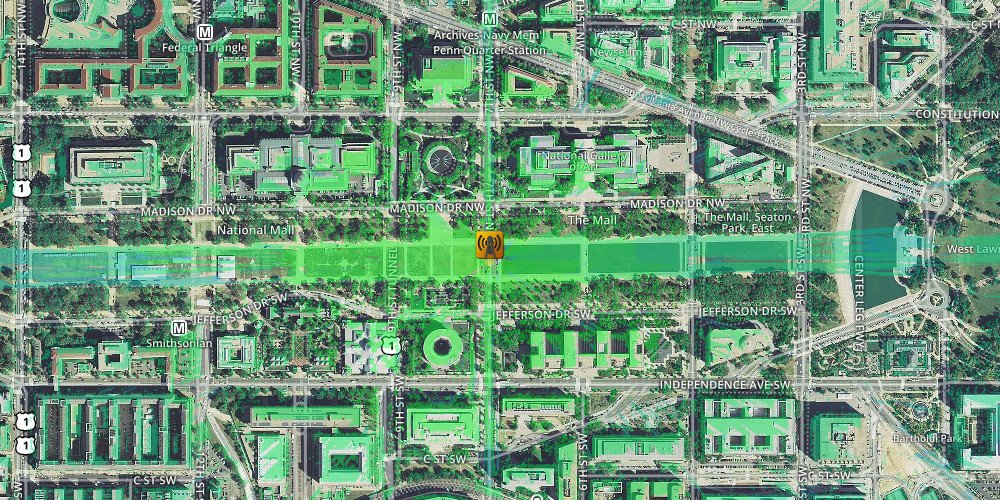
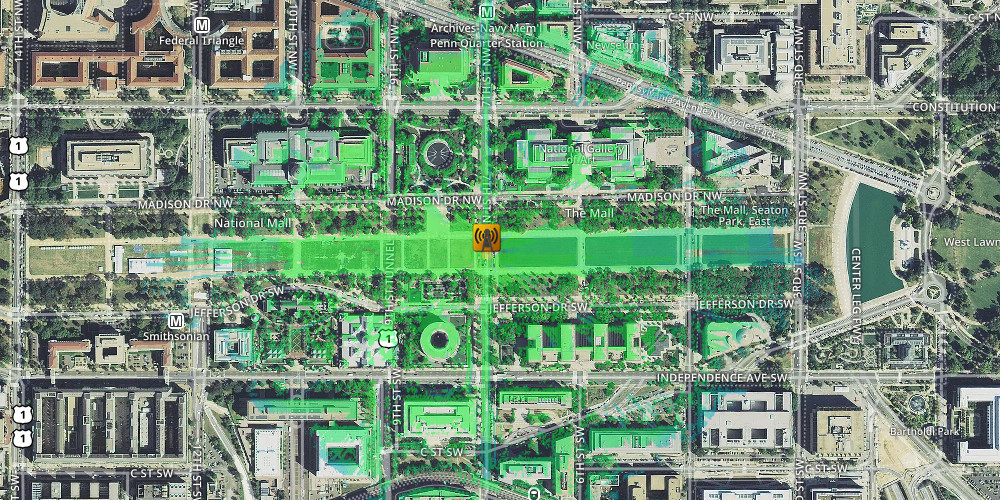
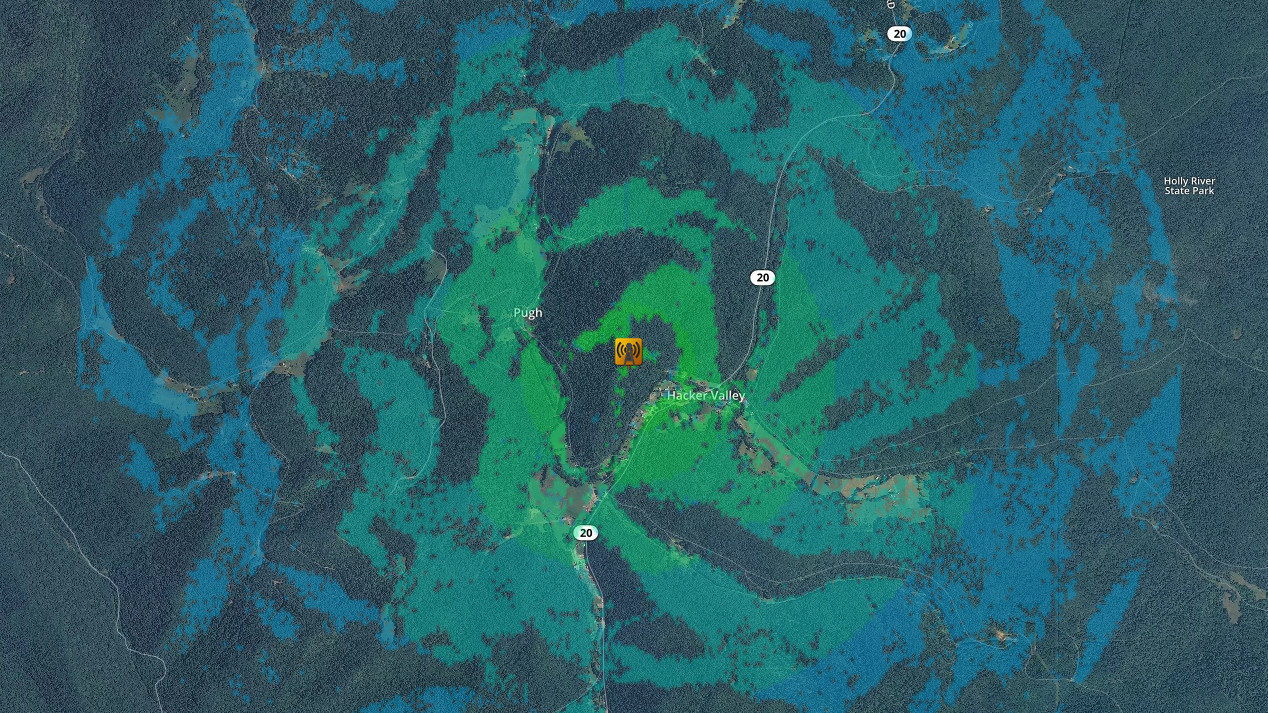
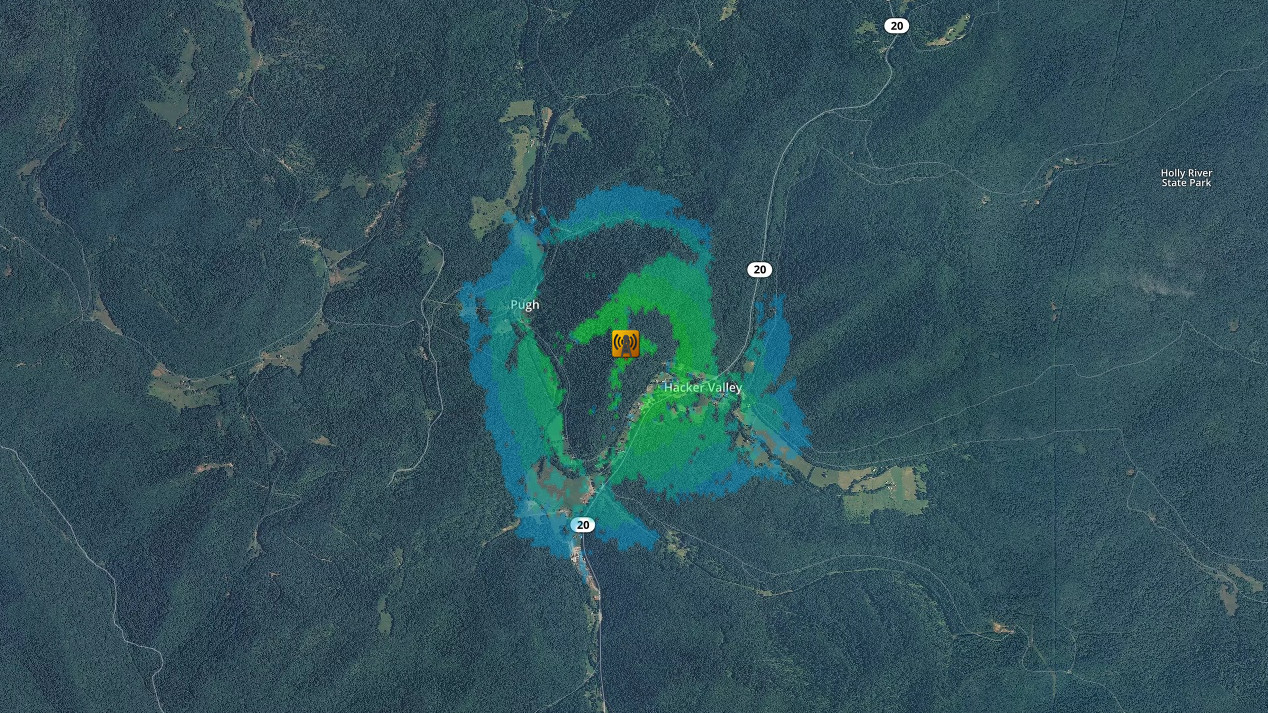
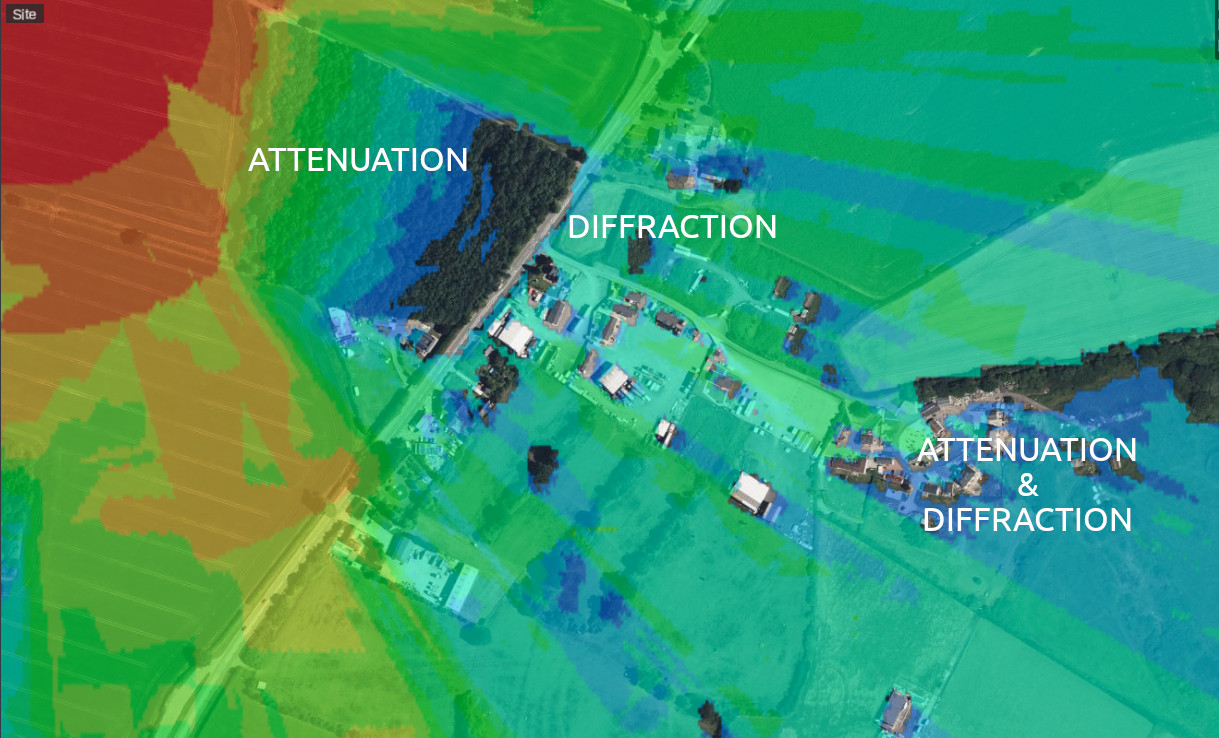
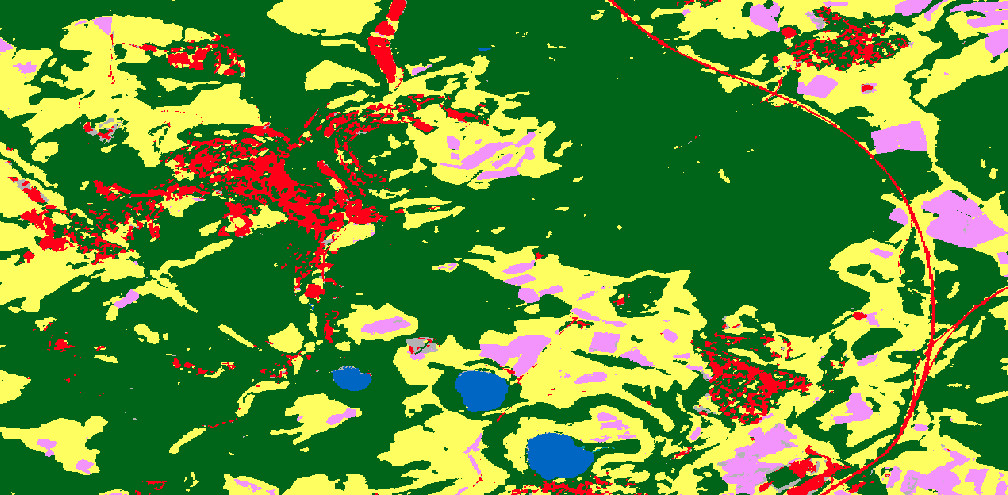
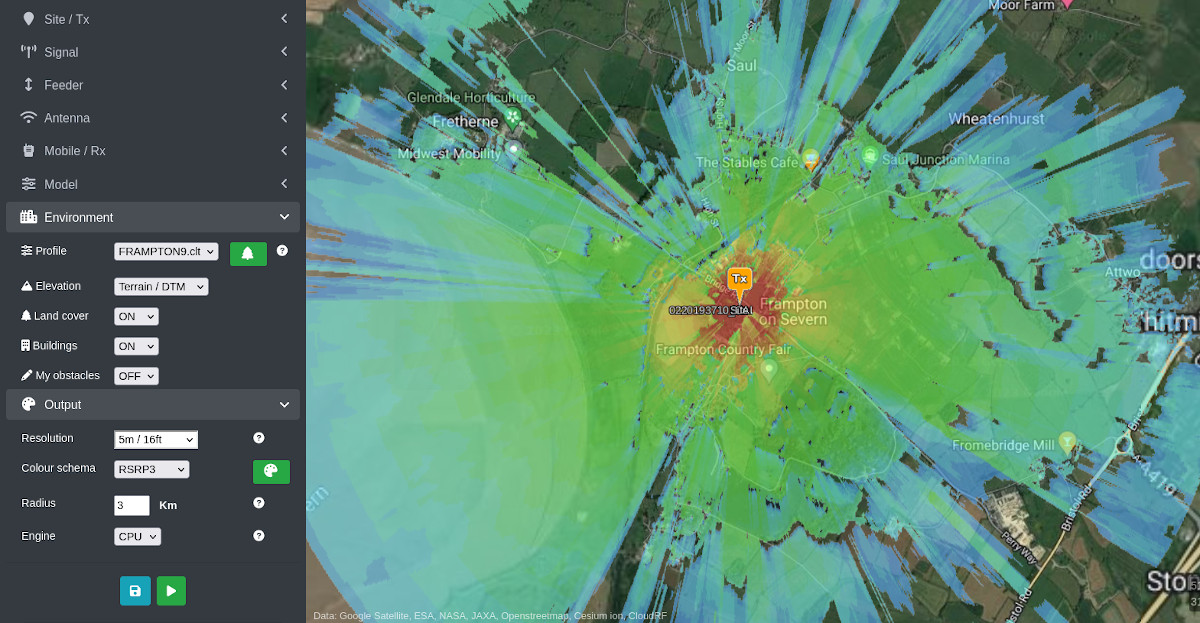
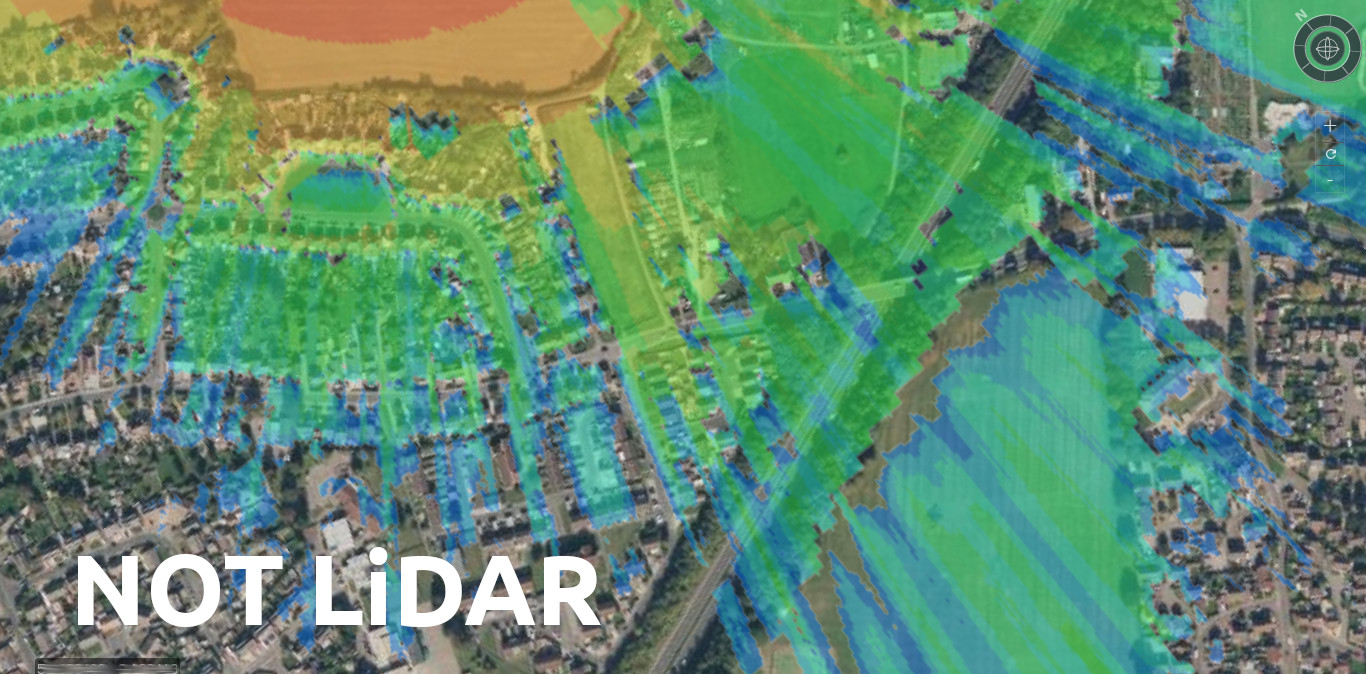
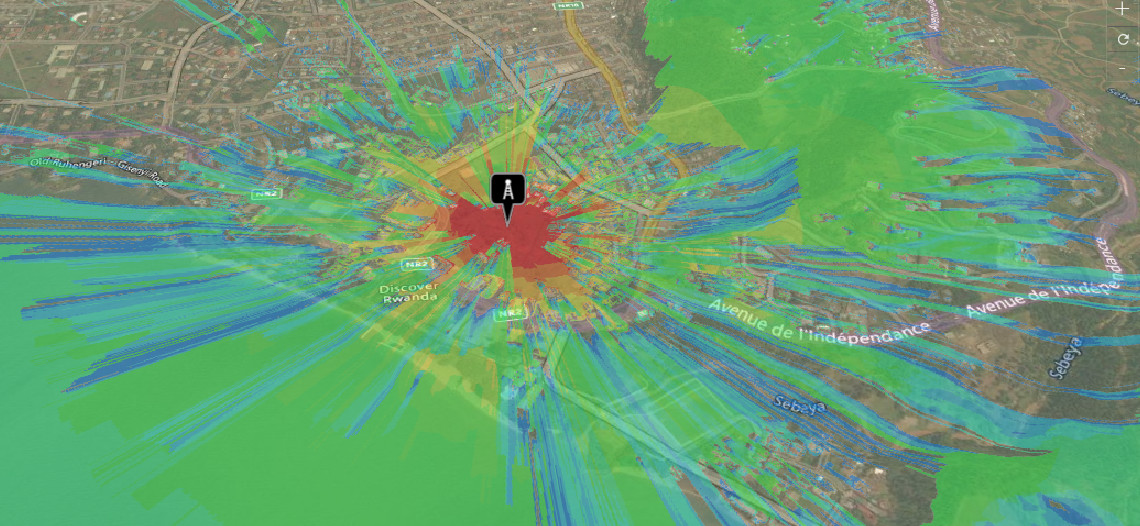
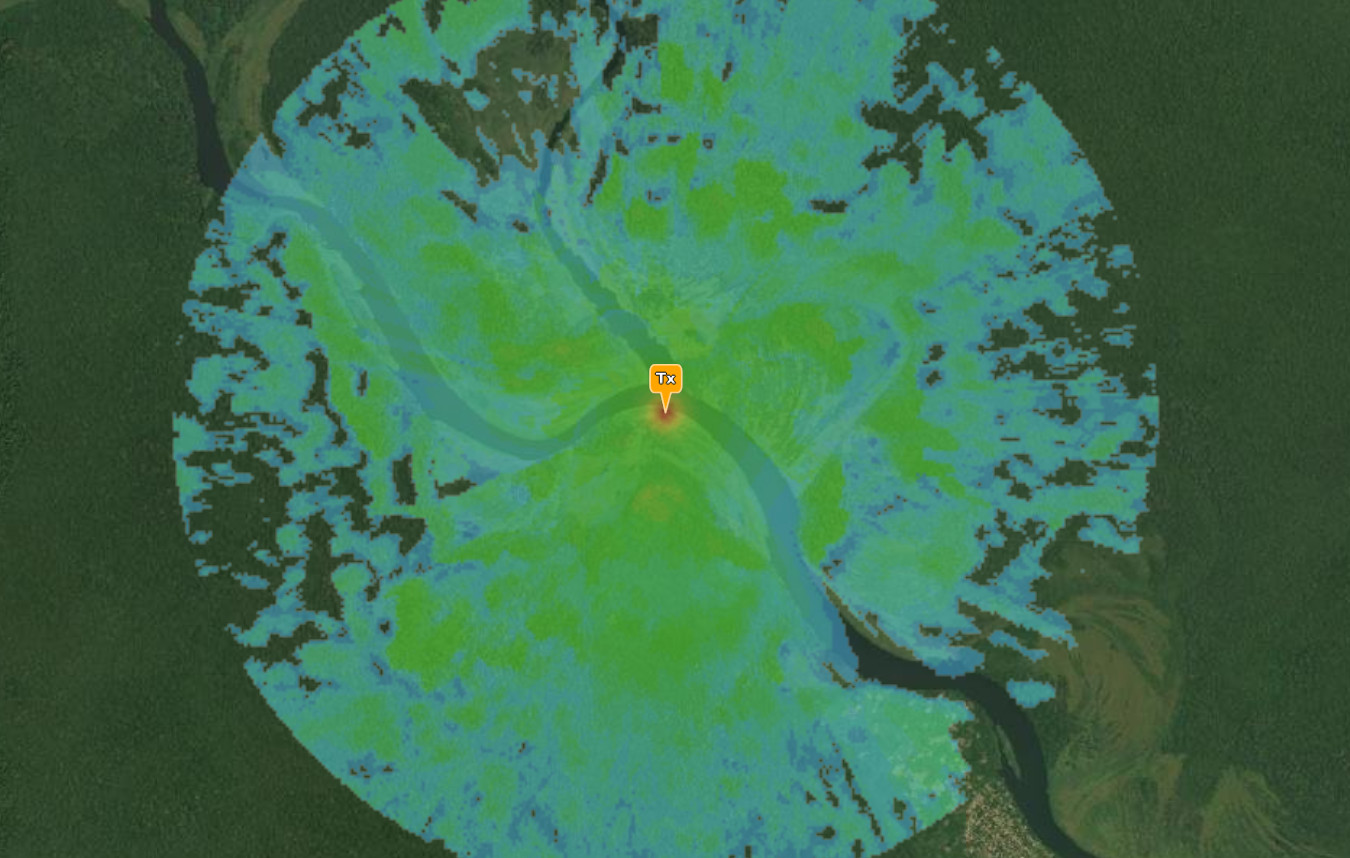
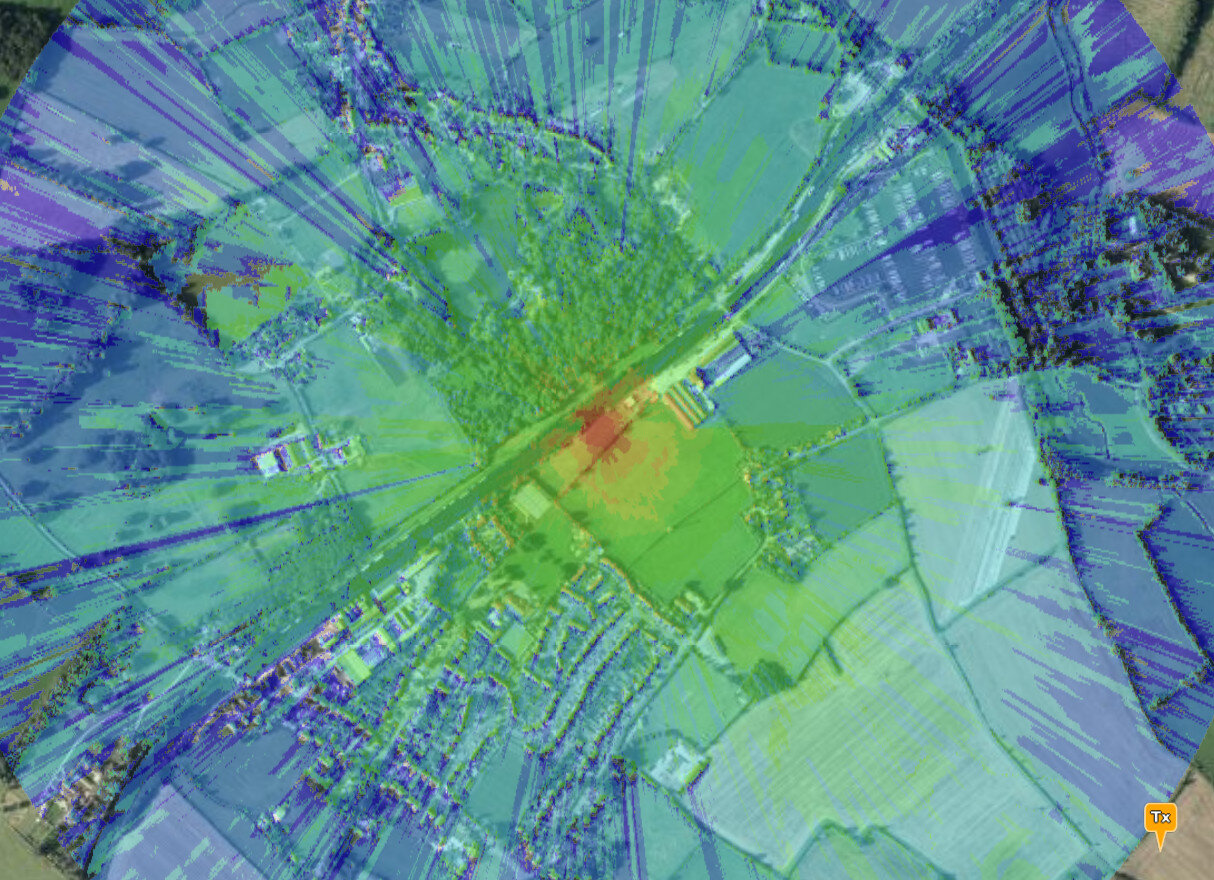
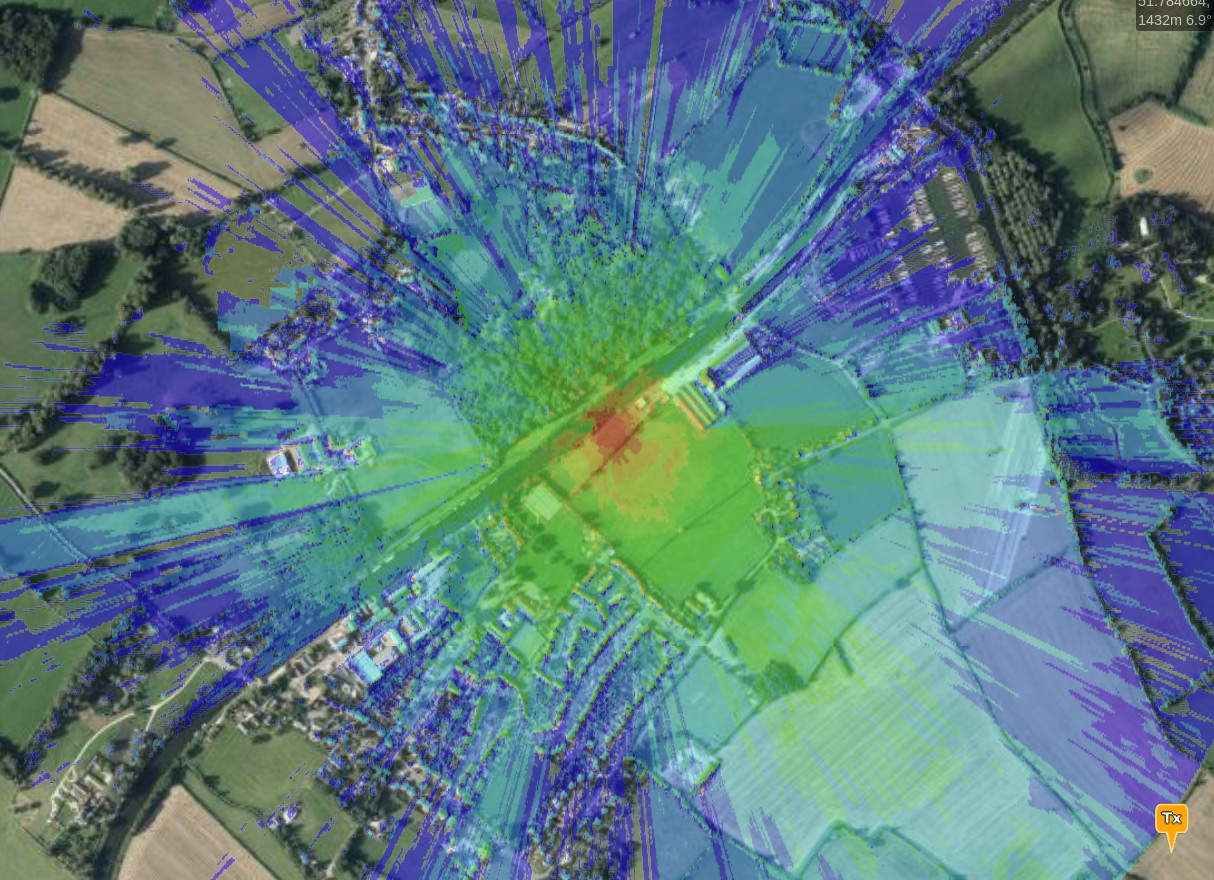
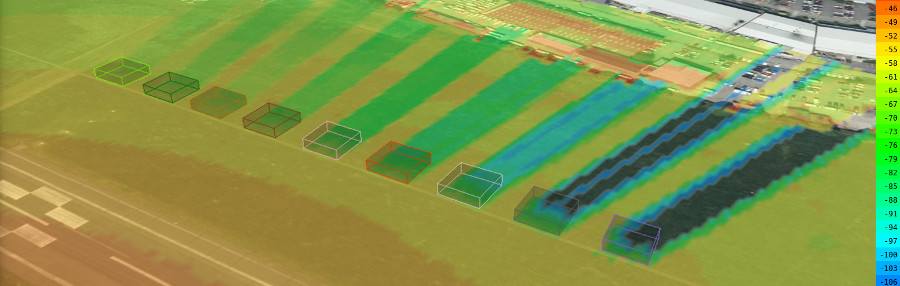
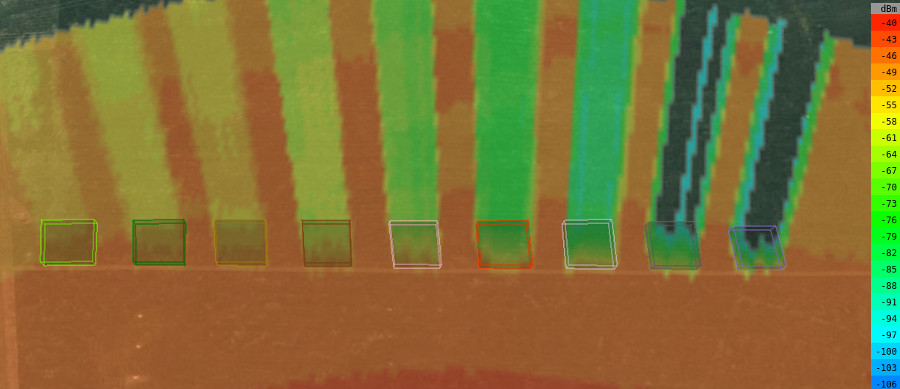
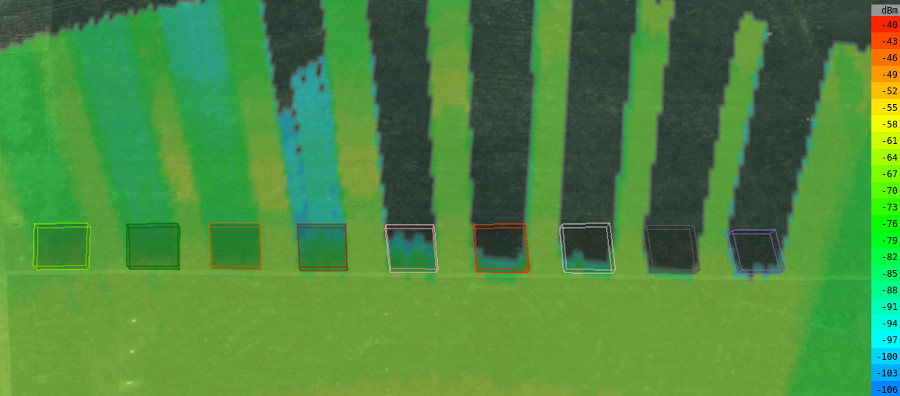
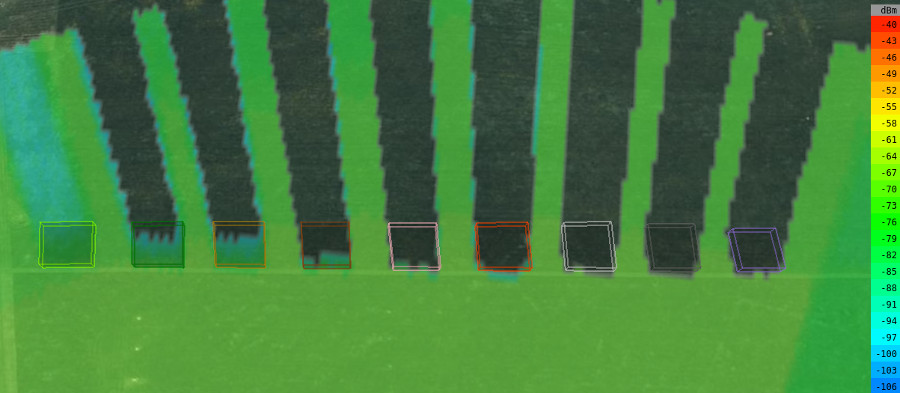
 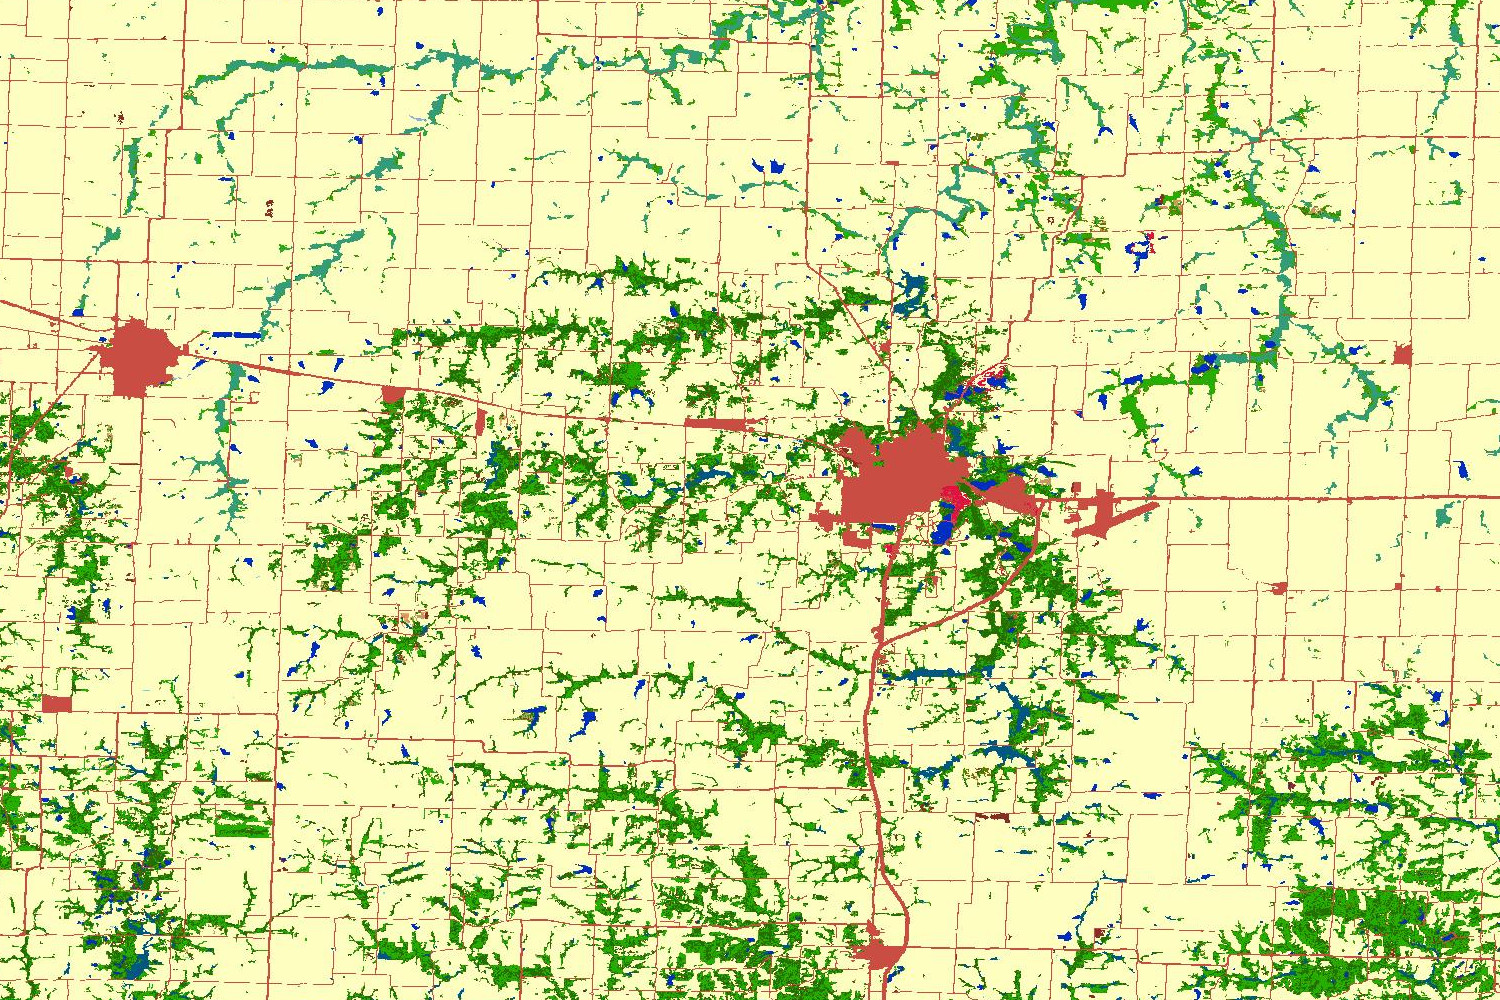 To enhance DTM and DSM models with 3D clutter, Land Cover data can be layered on top of the terrain to apply representative attenuation. This Land Cover data has been sourced from a variety of sources with up to 30m resolution. The total possible resolution possible is determined by the highest resolution data so if you are in New York City for example where there is 2m LIDAR / DSM data available, your effective resolution will be 2m.