


ATAK plugin
Android Team Awareness Kit (TAK) is a US Government situational awareness application, available for free on Android (ATAK). The civilian version is available for free on the Google Play store.
ATAK-CIV https://play.google.com/store/apps/details?id=com.atakmap.app.civ
Supported versions
ATAK-CIV 4.8.1
Requirements
ATAK-CIV
A CloudRF account or SOOTHSAYER server
A network connection
Release and debug builds
Due to the byzantine plugin signing process and compatibility matrix, there are a bewildering number of ATAK versions. Our plugin is signed by the TAK Product Center (TPC) which at the time of writing means it should work on CIV and MIL flavours.
A debug release is offered to work with the Github version which allows developers to demo capabilities without the need for plugin signing. A debug plugin build will only work with a debug build of ATAK. You can recognise this by the red letters DEVELOPER BUILD across the screen.
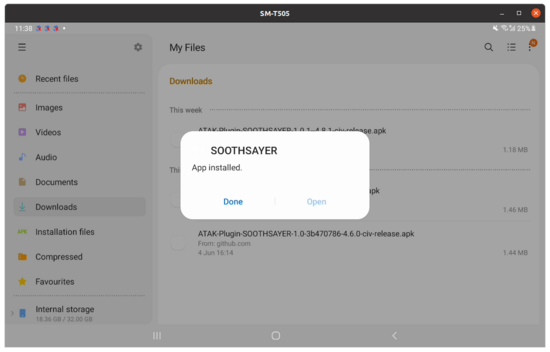
APK installation
Install ATAK-CIV on your phone first and then download the latest APK file from https://cloudrf.com/atak
You can download it directly from the device with a browser, send the file to the device via email/IM or copy it over via USB.
Before you attempt installation of the APK, ensure ATAK is running. If it is not running, installation will fail which is expected behaviour
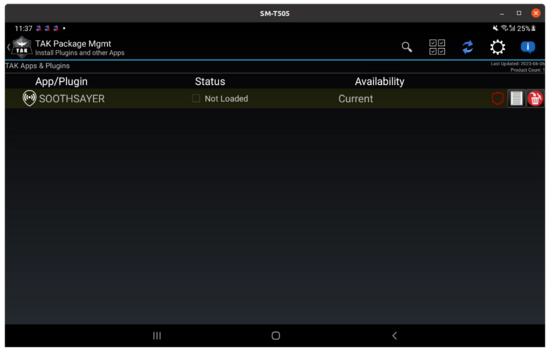
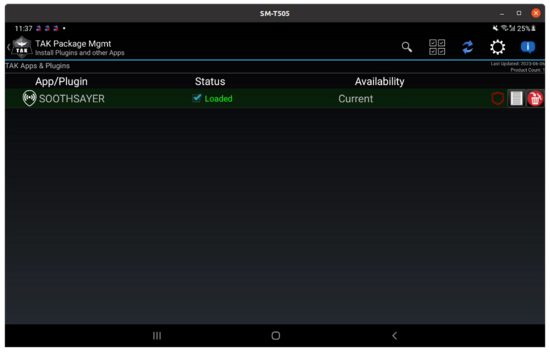
Plugin installation
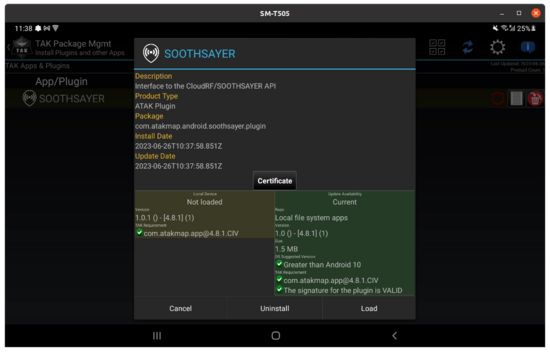
Within ATAK, open the plugin manager (jigsaw icon) and you should see the SOOTHSAYER plugin listed as available but not loaded. At this point you need to check the central status box to load the plugin. This is also where ATAK will check compatibility.
Validating the plugin version
To see details about the plugin version, click the report icon to the right. It should specify the required Android OS (10 in our case) and ATAK version (4.8.1.CIV) as well as the signature validity which for a TPC signed plugin should be valid:
Adding a shortcut in ATAK
Once installed the plugin will be available within ATAK. To add it to the quick menu, click the pencil marker adjacent to the “Tools” label above the icons. This opens up the navigation bar to editing so you can drag your new plugin up there.

Using the plugin
Press the icon to open the plugin. You should have a list select and at least two buttons. To add a radio to the map, choose the system from the list, then click the SOOTHSAYER button above it. A marker will be added to the middle of the map.
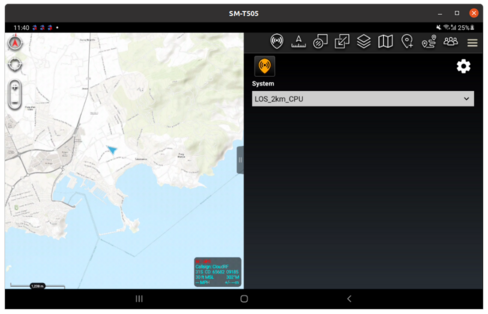
You must drag this marker to the desired location using a long press. Once released, the coverage will be calculated. A network connection is required to communicate with the server at this point.
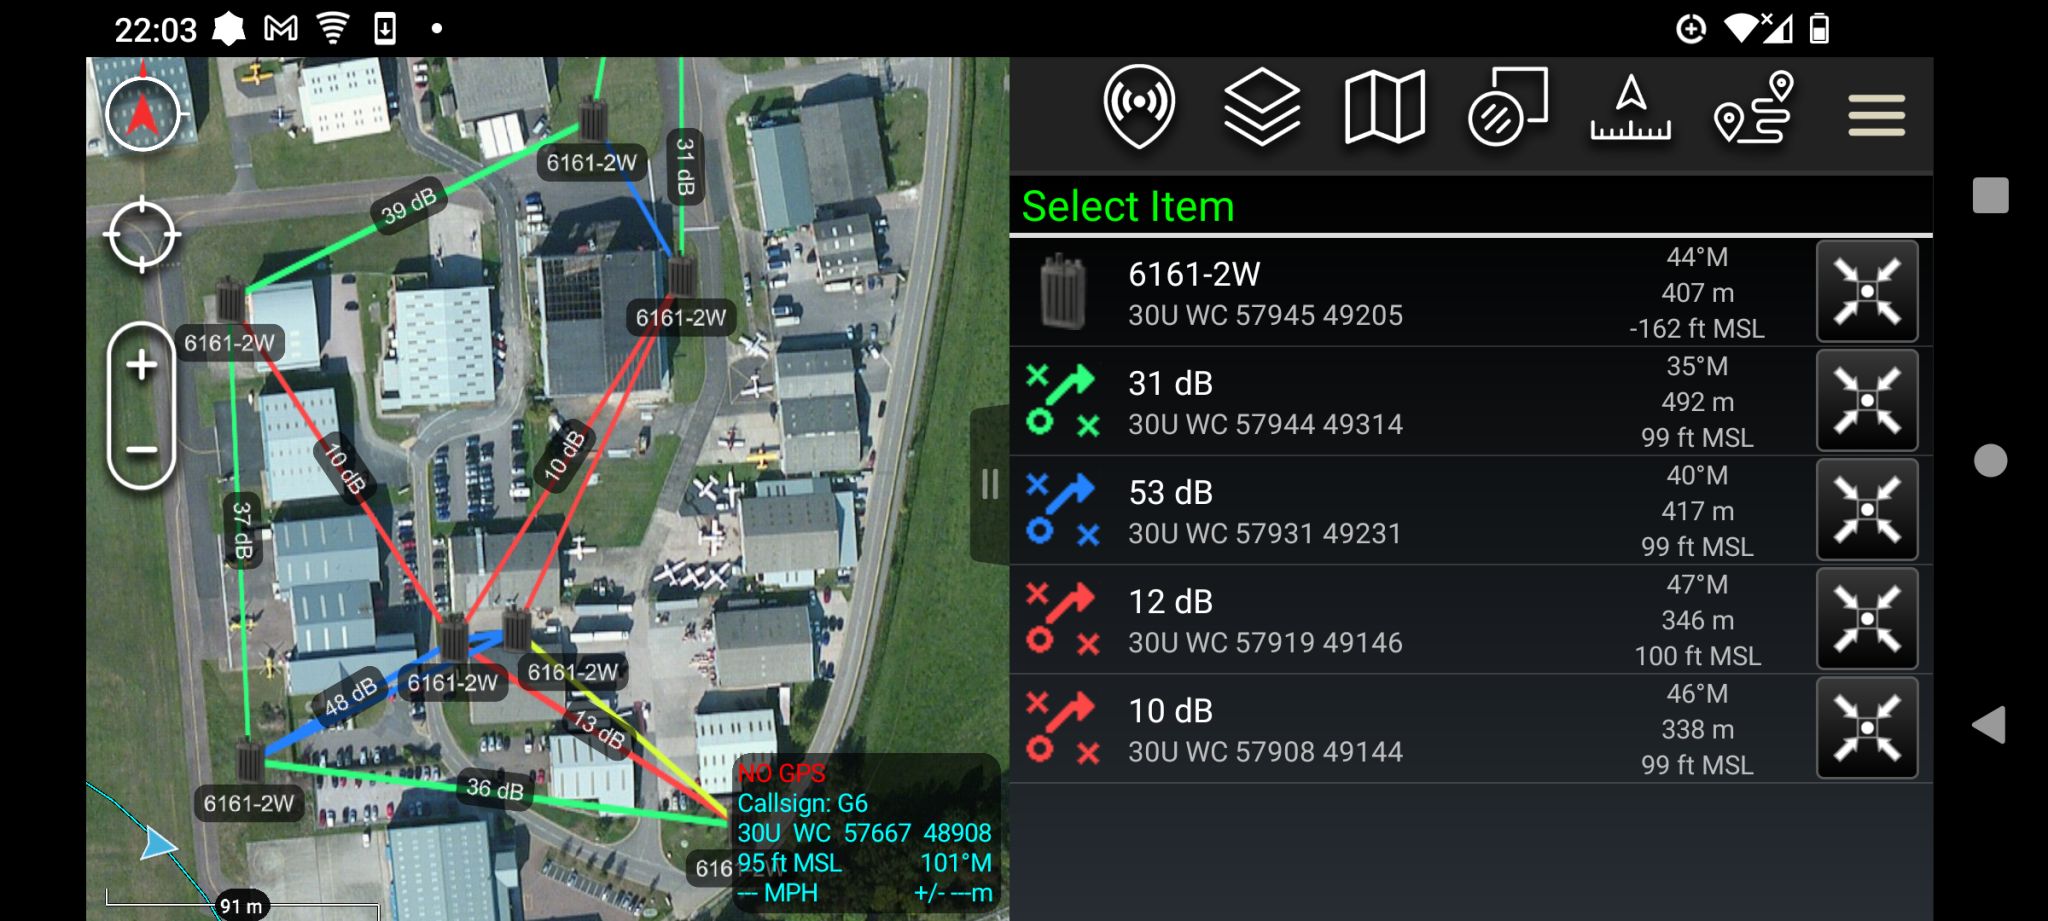
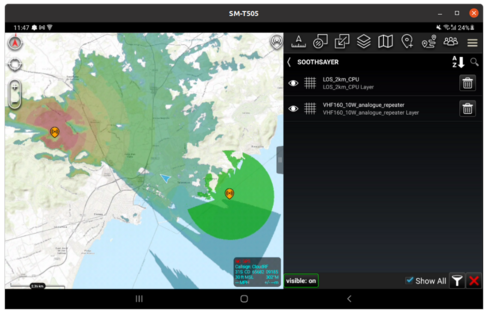
Single site mode
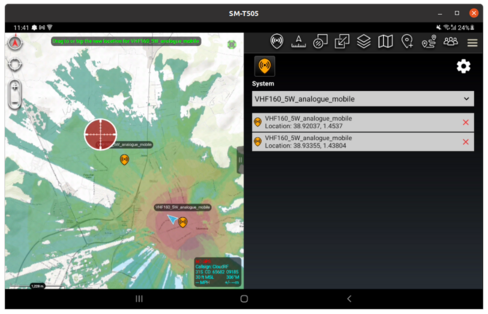
The default mode for calculations is to consider each site separately, as a separate layer. This allows different equipment to be placed upon the map, with different colour schemas, and site layers to be managed individually.
The downside to this mode is you may end up with many overlapping layers which you will need to manage through the ATAK layer menu to focus on what you need. These layers are available under the “SOOTHSAYER” category in the layers menu and can be hidden or deleted to suit.
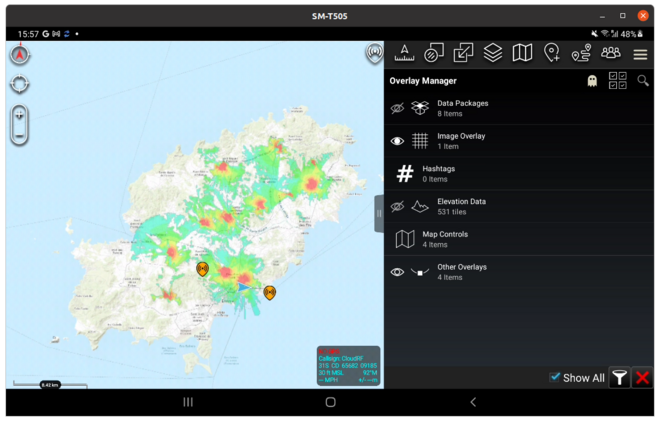
In this image, two different templates are used. One is a LOS coverage with green colours and the other is a VHF repeater with a rainbow heatmap.
Multisite mode
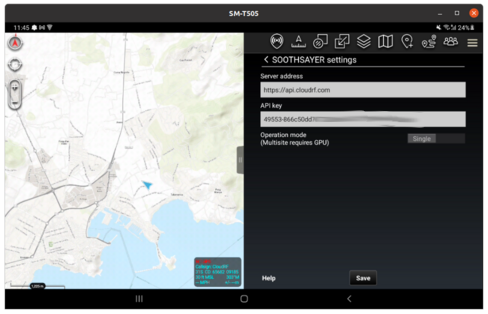
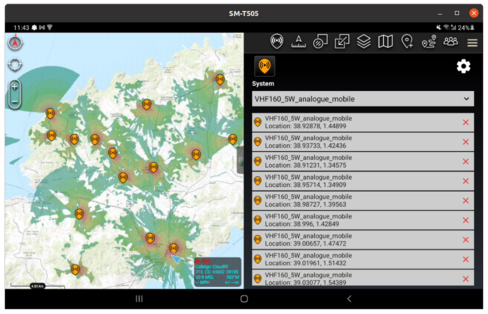
The multisite mode is a more powerful network planning capability which models all radios together to show the entire network coverage. Designed for MANET networks, it will model changes to the network as soon as you reposition a node.
Multisite requires a server with a GPU or a CloudRF Gold subscription.
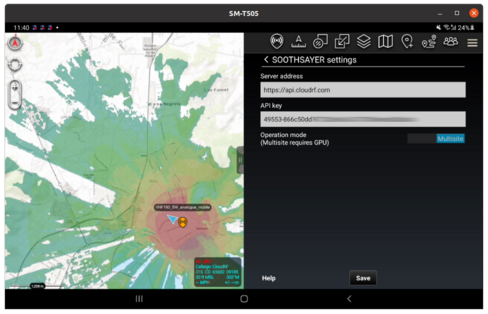
A multisite layer is a single layer which is available in the ATAK layers menu under the “SOOTHSAYER” category. It can be hidden or deleted to suit.
KMZ coverage export
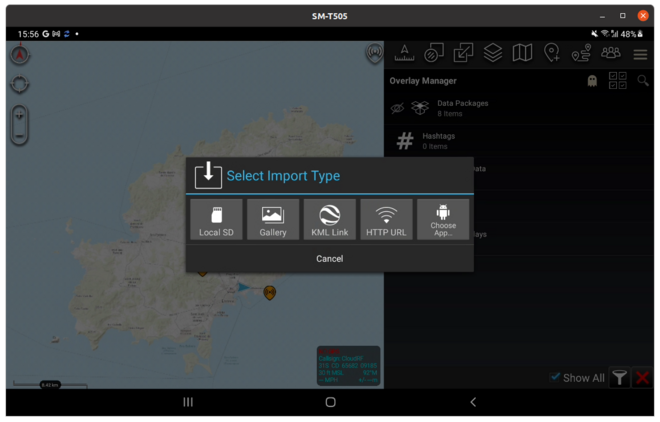
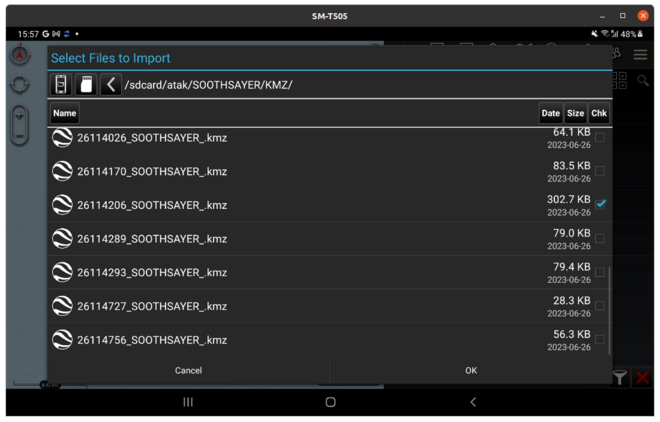
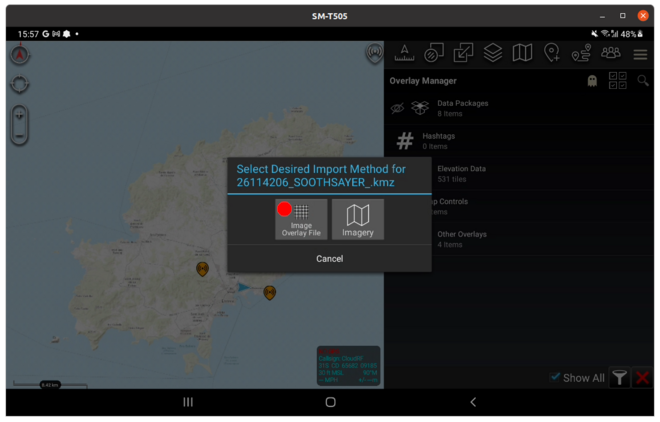
Layers generated with the plugin are saved as KMZ on the SD card in the atak/SOOTHSAYER/KMZ/ folder. You can load them into ATAK as standard KMZ overlays using the “Local import” dialog or export them to another viewer such as WinTAK or TAK-X. When prompted for a choice of the import method, choose “Image Overlay File”.
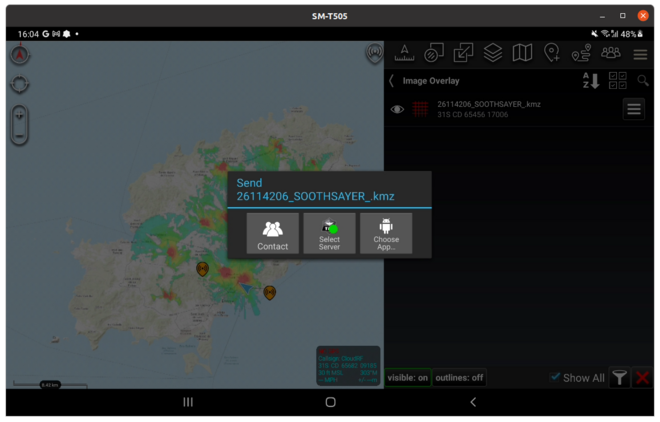
To send a KMZ to another TAK user, load it onto your map to validate it’s the right one, then using ATAK’s native send functionality, click the 3 bars to the right of the selected layer to open the send dialog. From here you can choose to send it to a contact, server or third party app eg. Bluetooth or Google Drive.
Radio Templates
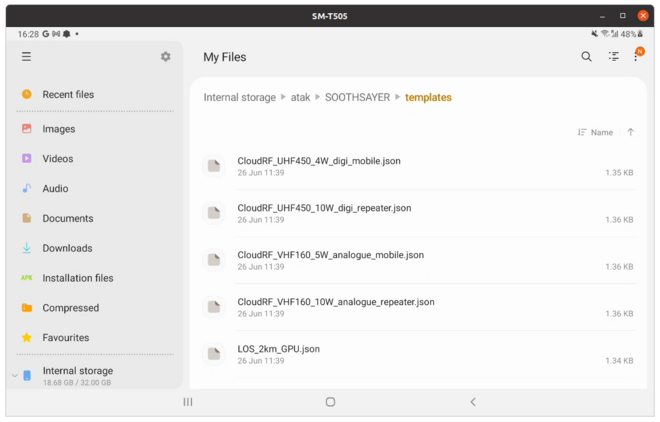
To add more radio systems, place your CloudRF/SOOTHSAYER JSON templates in the atak/SOOTHSAYER/templates folder. You can download templates from the top left corner in the CloudRF/SOOTHSAYER web interface. Templates in the plugin will refresh when you open it.
A template can be edited within any text editor and must conform to the CloudRF API specification detailed at https://cloudrf.com/documentation/developer/
At the time of writing both the old environment variables (cll,clm,clt) and the new ones (elevation,landcover,clutter,profile) are accepted.
Example DMR template
This template is for a 700MHz handheld radio with 2W of RF power, a CPU engine (engine: 2) with the ITM model, 3km radius and 5m resolution.
{
    "version": "CloudRF-API-v3.8.2",
    "reference": "https://cloudrf.com/documentation/developer/",
    "template": {
        "name": "Motorola DMR 2W",
        "service": "CloudRF https://api.cloudrf.com",
        "created_at": "2023-04-12T06:35:40+00:00",
        "owner": 1,
        "bom_value": 0
    },
    "site": "Site",
    "network": "MOTO",
    "engine": 2,
    "coordinates": 1,
    "transmitter": {
        "lat": 51.96403,
        "lon": -2.113952,
        "alt": 2,
        "frq": 700,
        "txw": 2,
        "bwi": 0.1,
        "powerUnit": "W"
    },
    "receiver": {
        "lat": 0,
        "lon": 0,
        "alt": 1,
        "rxg": 2,
        "rxs": -100
    },
    "feeder": {
        "flt": 1,
        "fll": 0,
        "fcc": 0
    },
    "antenna": {
        "mode": "template",
        "txg": 2.15,
        "txl": 0,
        "ant": 39,
        "azi": 0,
        "tlt": 0,
        "hbw": 1,
        "vbw": 1,
        "fbr": 2.15,
        "pol": "v"
    },
    "model": {
        "pm": 1,
        "pe": 2,
        "ked": 1,
        "rel": 95
    },
    "environment": {
        "clm": 0,
        "cll": 0,
        "clt": "Minimal.clt"
    },
    "output": {
        "units": "m",
        "col": "LTE.dBm",
        "out": 2,
        "ber": 1,
        "mod": 0,
        "nf": -124,
        "res": 5,
        "rad": 3
    }
}
Example GPU ‘line of sight’ template
This template uses the more powerful GPU engine (engine: 1) to model line of sight out to 3km at 2m resolution (if your area of interest has 2m LiDAR).
{
    "version": "CloudRF-API-v3.8.2",
    "reference": "https://cloudrf.com/documentation/developer/",
    "template": {
        "name": "LOS_3km_2m_GPU",
        "service": "SOOTHSAYER https://185.11.204.106",
        "created_at": "2023-05-05T15:43:42+00:00",
        "owner": 8,
        "bom_value": 0
    },
    "site": "Site",
    "network": "TALON",
    "engine": 1,
    "coordinates": 1,
    "transmitter": {
        "lat": 50.806335,
        "lon": -1.112032,
        "alt": 2,
        "frq": 1250,
        "txw": 2,
        "bwi": 0.1,
        "powerUnit": "W"
    },
    "receiver": {
        "lat": 38.913,
        "lon": 1.45,
        "alt": 1,
        "rxg": 2,
        "rxs": -90
    },
    "feeder": {
        "flt": 1,
        "fll": 0,
        "fcc": 0
    },
    "antenna": {
        "mode": "template",
        "txg": 2,
        "txl": 0,
        "ant": 39,
        "azi": 0,
        "tlt": 0,
        "hbw": 1,
        "vbw": 1,
        "fbr": 2,
        "pol": "v"
    },
    "model": {
        "pm": 7,
        "pe": 2,
        "ked": 0,
        "rel": 50
    },
    "environment": {
        "clm": 0,
        "cll": 0,
        "clt": "Temperate.clt"
    },
    "output": {
        "units": "m",
        "col": "GREEN.dBm",
        "out": 2,
        "ber": 1,
        "mod": 0,
        "nf": -124,
        "res": 2,
        "rad": 3
    }
}
Template limits
As a server based system, limits for APIs and accounts are set at the server. For premium users this means a 500km / 310Mi radius and a resolution between 1m / 3ft. The combination of these two will determine the resulting file size. The API will automatically reduce unreasonable parameters to fit within memory.
As well as memory, a large layer needs more bandwidth to communicate and is generally not recommended. You should be aiming for smaller layers which can be generated and communicated quickly. You can still do a large radius eg. > 100km, but will need to offset your resolution to keep the total size less than 1 mega pixels (1000 x 1000px).
As a rule of thumb, multiply the radius in km by 2 to get the resolution in metres
The following guide is recommend for practical 1MP ATAK templates:
Desired radius km |
Recommended max resolution m |
|---|---|
1 |
2 |
2 |
4 |
5 |
10 |
10 |
20 |
20 |
40 |
50 |
100 |
100 |
200 |
150 |
300 |
Giant airborne calculations
The API can model out to 500km radius for aircraft. If you set 500km as the radius with 100m resolution you are generating a 10k x 10k image measuring 100 mega pixels! This will take a long time to make, a long time to download and then will crash ATAK, and any other Android map for that matter. To do this scale of calculation, use a resolution of 300m which makes a more digestible 11MP image. Better still reduce the radius to the radio horizon which is 357km for an aircraft at 10,000m (33,000ft).
Custom icons
You can insert a custom icon into a JSON template as a 48x48px base64 encoded PNG. Examples are included on the Github repo.
![]()