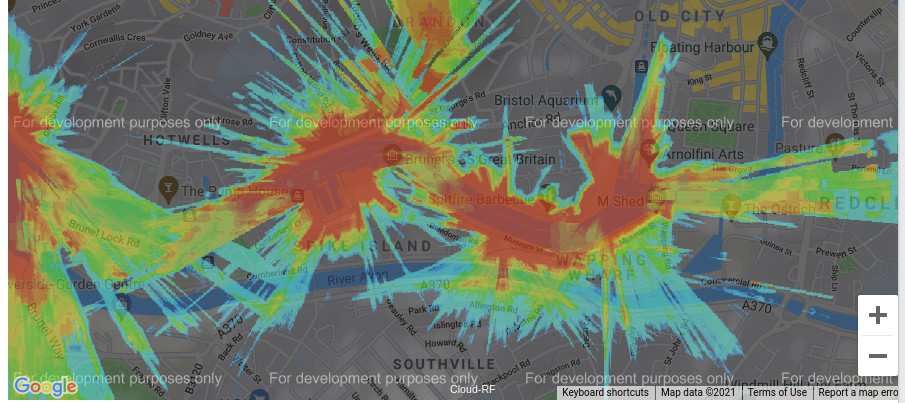
If you’re a wireless internet service provider or an organisation who want to show an online coverage map there are different options available depending on your level of skill. The basic option is to do this with an arbitrary polygon on a free map like Google maps but if you want a beautiful and accurate physics based coverage map, at no extra cost read on…
Embed code
The easiest way to add a map to your website or blog is with the embed code function. This is a small code (HTML) snippet which you paste into your website, like WordPress, for example. It requires that your blog supports HTML content.
To use this first you must have a layer in your archive. This could be a single area calculation or a large network mesh created from lots of individual calculations. Select it and click the code icon.
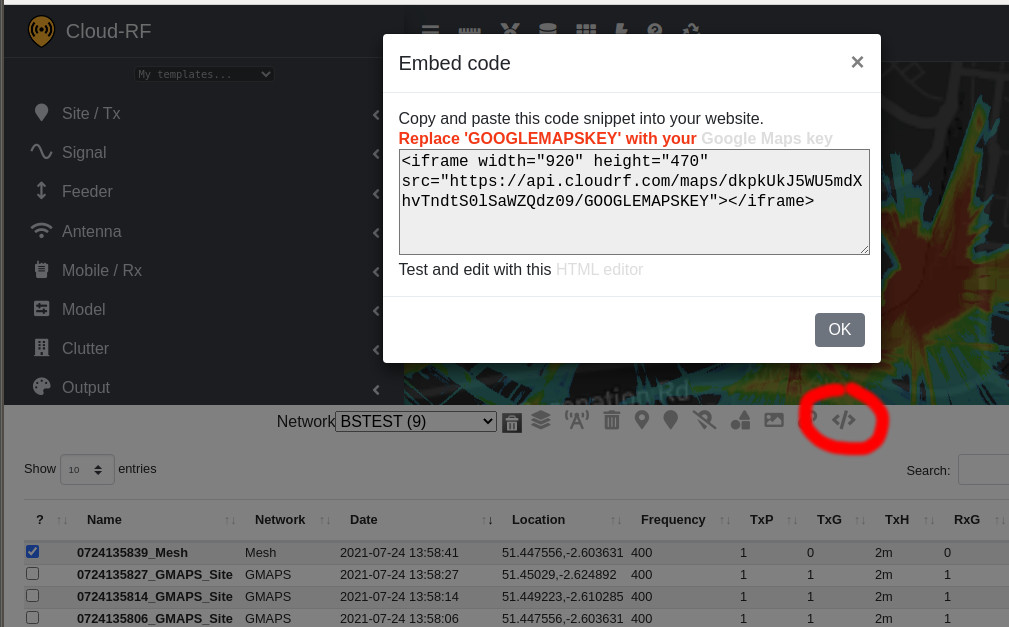
You will then be shown your embed code and a notice.
Google Maps Key
The notice says “Replace ‘GOOGLEMAPSKEY’ with your Google Maps key“. This is necessary as you need a key to share an online map as it’s licensed, not a free-for-all. You can get a key at no cost from Google if you visit this link:
https://developers.google.com/maps/documentation/javascript/get-api-key
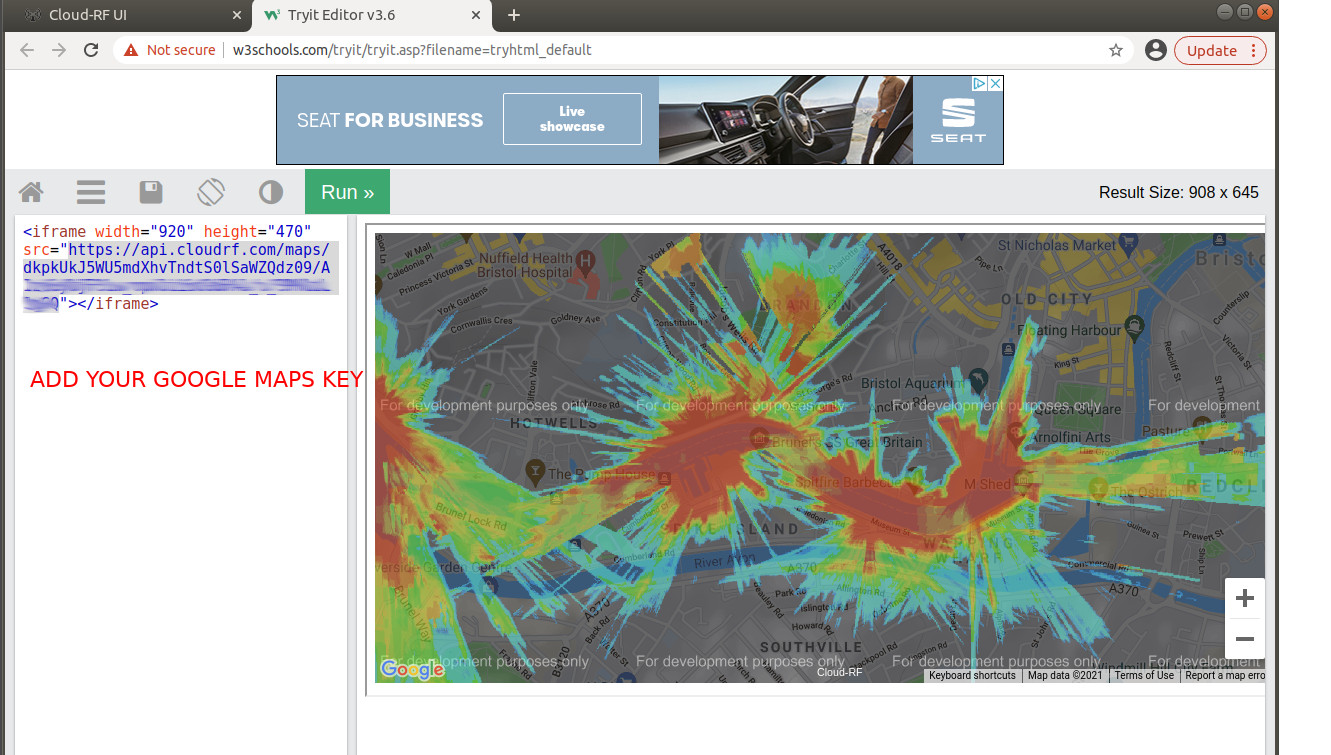
To test your key works visit a HTML online editor, paste in your embed code and replace GOOGLEMAPSKEY with your long random Google Maps key. If successful you will see your map and your embed code is ready to go on your website!
Self-hosted (Expert mode)
The downside to embed code is the layer must be fetched from a server from Europe. For most users this won’t be a problem but if you are in Australia and your layer is quite large this could result in a blank map for a second or two – not a great advert if you are a business.
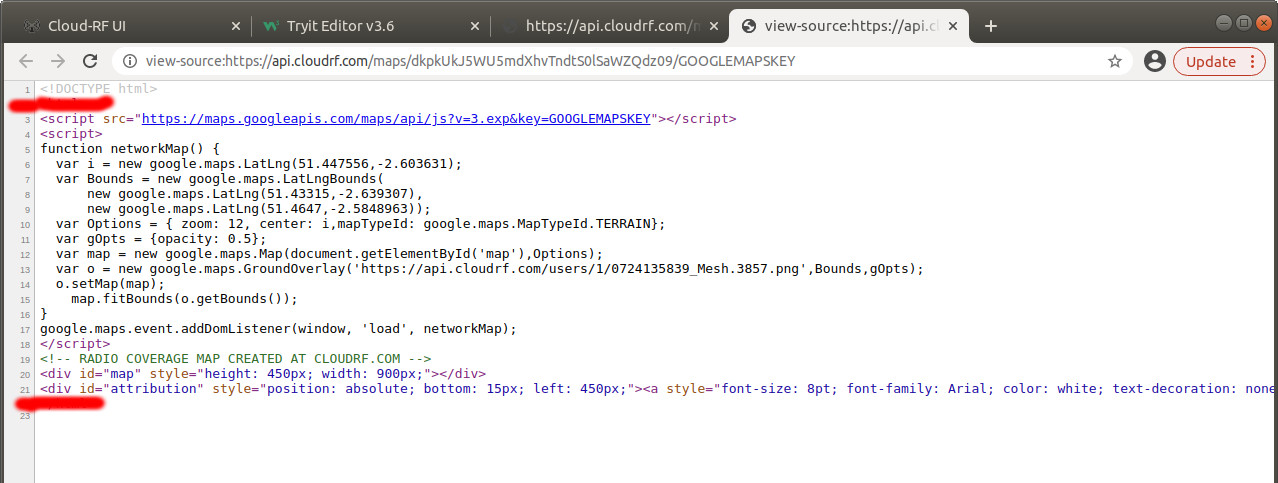
To deliver a faster map to your local customers, host the layer yourself. To do this, take the previously described embed code and extract the long link starting https://api.cloudrf.com/…
Paste that into a browser to visit the page directly then view the source code. Here you will find a link to a .png image in your archive as well as the necessary Google Maps Javascript.
Copy that code to your own website and download the PNG image. Upload the PNG image to your server and edit the link so it points to the local copy eg. yourcompany.com/files/yourlayer.png
Copy the code between the html tags.
Terms and attribution
You can host as many of these maps as you like for no extra cost but unless you have written permission, attribution is required. This is already included as a small link on the map but we won’t object if you want to add your own label too.
We will host your data so long as your account is in credit. If your account is not in credit we will retain the data as per the plan limit which is two years in most cases.
If you need your image to be available for lots of website visitors or for longer than 2 years, we strongly recommend self-hosting your PNG layers.