TAK Interface
Team Awareness Kit (TAK) is a US Government situational awareness application, available for free on Android (ATAK), Windows (WinTAK) and iOS (iTAK).
As a network capability a TAK server is required to get the most out of ATAK. The official government OG server is now in the public domain and supported by our SOOTHSAYER chatbot which provides a scalable network-plugin for all EUDs on a TAK server.
The capability was originally designed around taky, an open source TAK server, but since OG was published it was reworked to use the Marti API so, officially, only supports the OG TAK server.
![]()
Links
TAK Server install with Docker
Supported versions
ATAK >= 4.3
WinTAK >= 4.5
OG TAK server >= 4.5
*iTAK support is limited pending KML
Design
A core function of ATAK is instant messaging with it’s Cursor-on-Target XML schema ‘CoT’. CoT allows users to exchange layers as well as freehand messages making it easy to interact with an End User Device (EUD) via XML messages.
The SOOTHSAYER chatbot simulates a client to marshal CoT XML commands and shapes to our JSON API. Responses are packaged as data packages which are uploaded directly to a TAK server from where clients pull them down. The client never directly interfaces with the CloudRF API since all communications are with the TAK server.
SOOTHSAYER chatbot setup
If you can connect an EUD to your own TAK server, you can connect the chatbot to it as a client also. You will need to create a user with certificates on the server for the bot eg. chatbot1 and then copy the certificates to use in PEM format. SSL certificates are employed to authenticate both the server and the bot and secure communication.
Certificate generation on TAK server
You must create a certificate pair for the secure chatbot on the TAK server. The makeCert.sh script will create the certificates in the required .pem format:
root@takserver:/opt/tak/certs# ./makeCert.sh client chatbot1
Certificates are checked for formatting and compatibility so take care to upload the correct type. Upload your files, set your server address and port and click submit. A check will be performed and if they are good, you can attempt to connect to the server by clicking “Start Chatbot”.
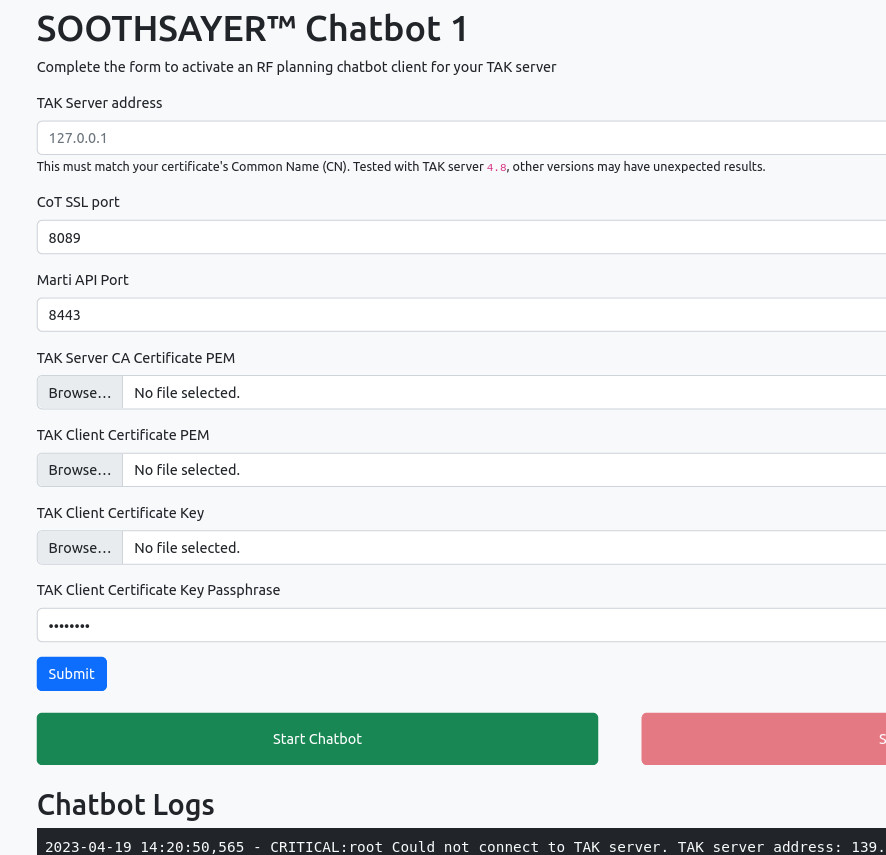
TAK Server CA certificate
This is the public certificate authority (CA) which was used to sign the server’s certificates eg. ca.pem. This is needed to trust the server.
TAK client certificate
This is the user/bot public certificate with a .pem extension. Found in ../tak/certs/files/
TAK client key
This is the user/bot private key with a .key extension. Found in ../tak/certs/files/
Once connected it will be available in the chatroom for all EUDs who share the same group as SOOTHSAYER. Access control to the bot can be managed with TAK groups.
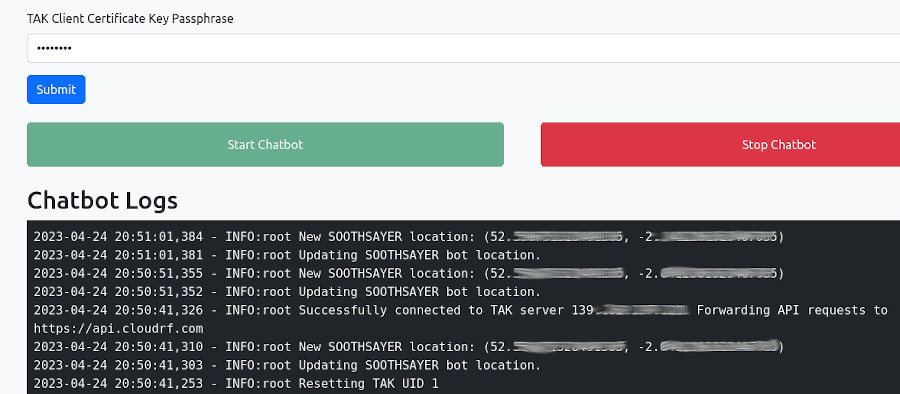
Testing communications
When the certificates have been uploaded and validated, communications can be started by clicking the green ‘Start chatbot’ button. The server will need to be able to communicate with the TAK server which may require a firewall rule depending on your setup. A successful connection will report messages within the console showing “Updating SOOTHSAYER bot location”. The bot will be positioned to be nearby active users based upon observed locations.
TAK server administration
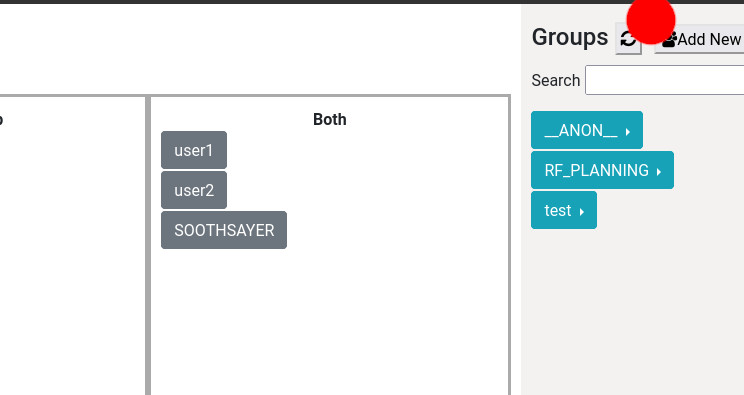
Groups
Once connected, the bot will join the default _ANON_ group on the server and will be available to anyone in that group. This can be ok but for more control, create a group (Administration menu > Groups) for RF planning and explicitly add users to it.
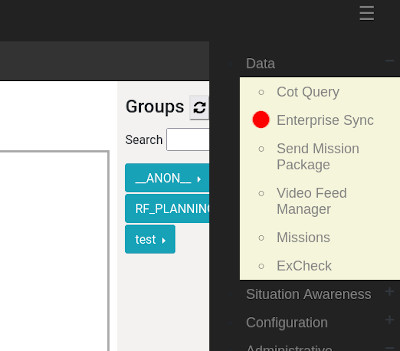
Housekeeping
During use, the server will store .ZIP data packages containing RF layers like any other TAK data package. They can also be communicated to other TAK users using generic TAK server methods and sync plugins. These DP files can be found, downloaded, and deleted within the Enterprise Sync (File manager since 4.9) interface (Data > Enterprise Sync)
SOOTHSAYER Commands
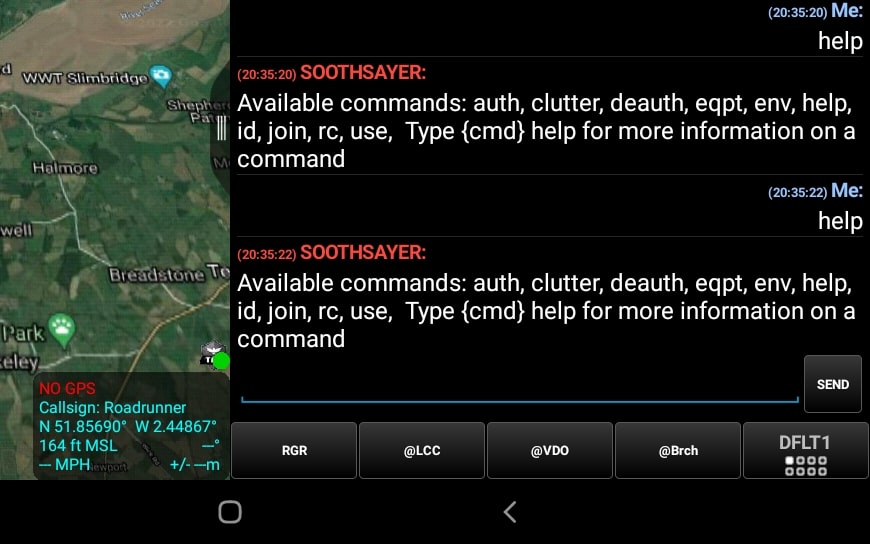
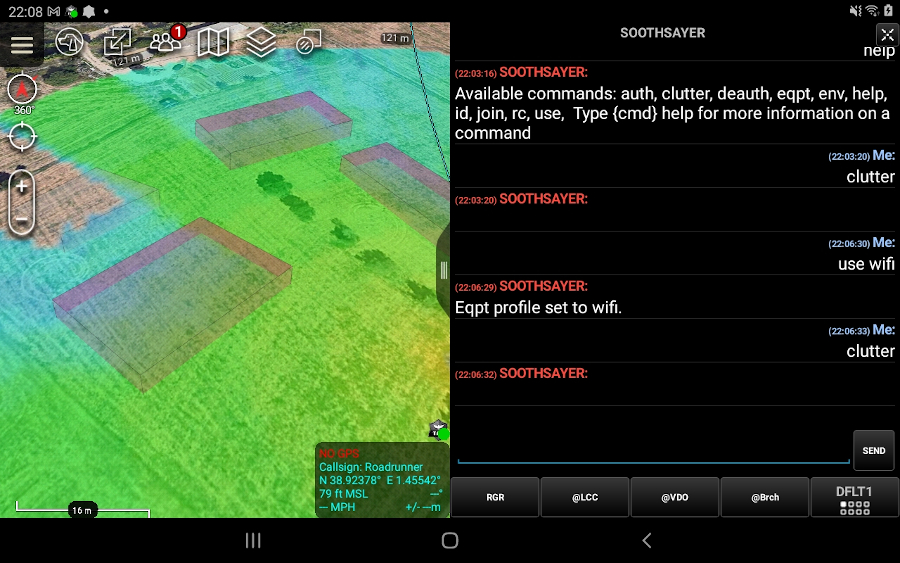
Interaction with SOOTHSAYER is done via the native ATAK chatroom. Select SOOTHSAYER and send a help command to test connectivity.
Commands for the bot are as follows:
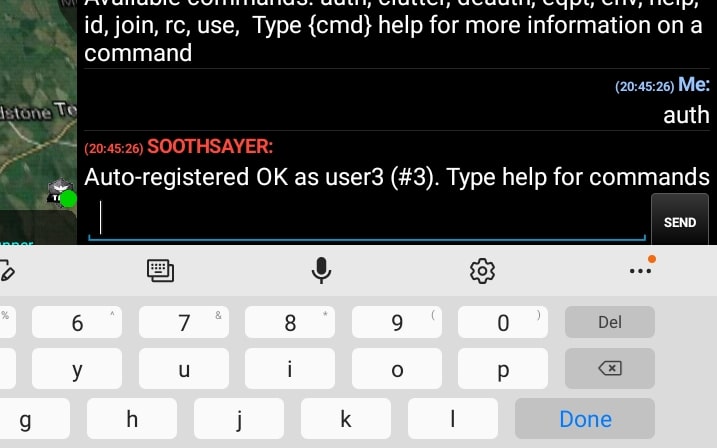
auth - Authorisation
Before you can start RF planning you must authorise your device to the server. SOOTHSAYER users can just type auth to associate their device. This is needed so all subsequent messages can be correctly routed to the EUD.
A successful authorisation will generate a welcome user response.
clutter
Fetch a KMZ layer with your custom clutter polygons with the clutter command. These must have been added to your account.
deauth
Detach this device from the account to free up a slot on the server with the deauth command.
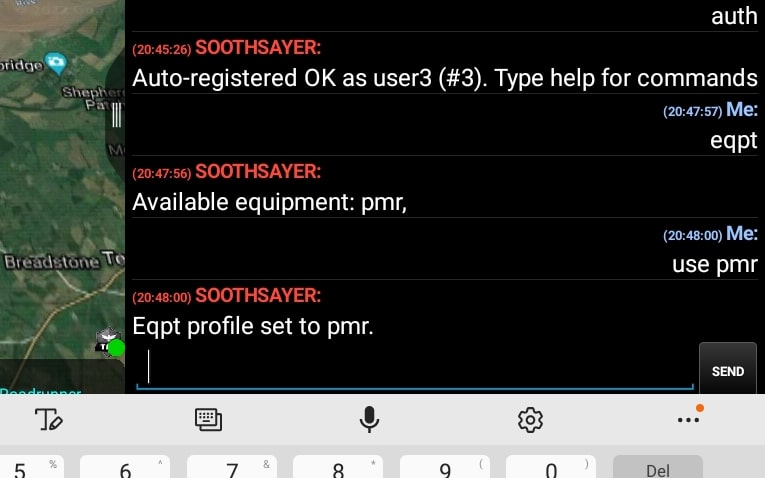
eqpt
SOOTHSAYER abstracts complexity to server based templates so users need only pick their equipment. Type eqpt to list templates available to your account. To create a template see the saving templates function within the web interface. To use an item type use followed by the eqpt you wish to use, for example use pmr for example to select a pmr template.
env
List environmental profiles. Use one with env {profile}, for example env minimal.clt.
heat
Enable or disable the network heatmap for the multisite coverage.
This powerful feature requires a GPU so either a CloudRF Gold plan or a private server is required.
help
For more information on a command type the command followed by help, for example eqpt help to get information about the eqpt command.
You can also just send help on its own to get a list of available commands.
id
Returns useful information about your device with the id command. This includes configuration and associated/followed networks.
join
Associate this device with a radio network to enable network analysis tools, for example join blue.
links
Enable or disable links for the multisite mode. Uses the CPU engine.
rc
Perform a radio check against a network, for example rc blue.
use
Use a piece of equipment, for example use vhf. List the equipment with the eqpt command. Not case-sensitive.
Functions
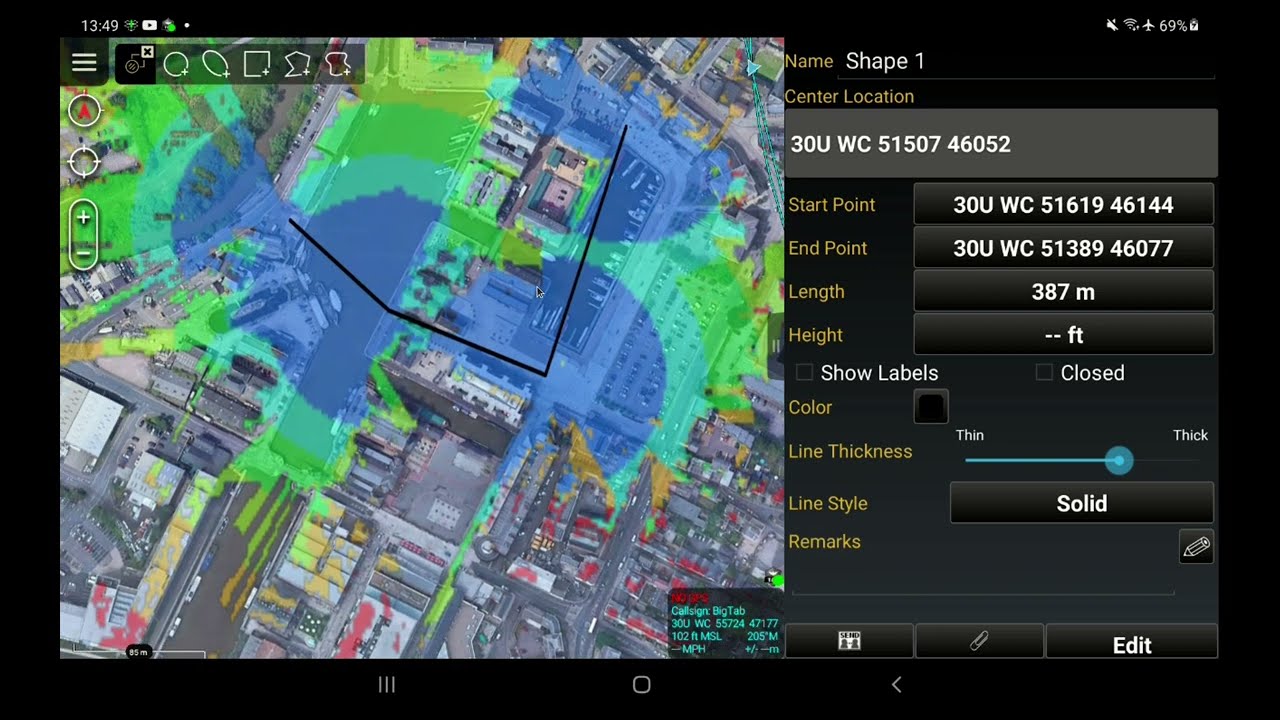
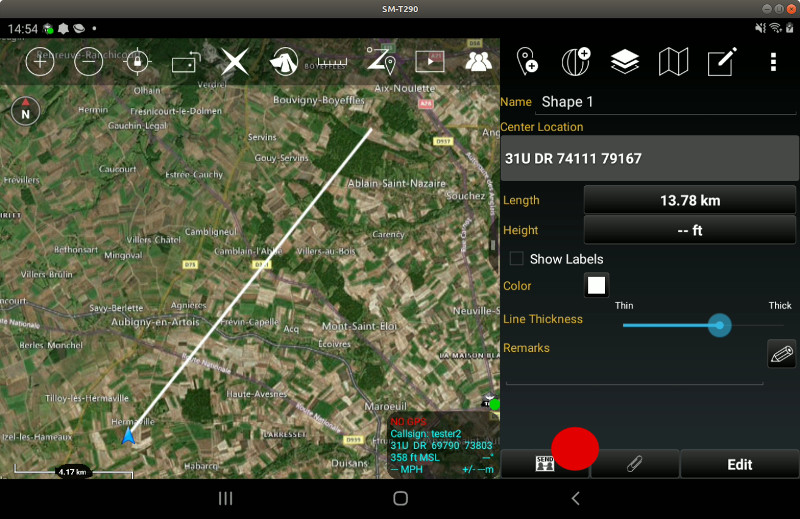
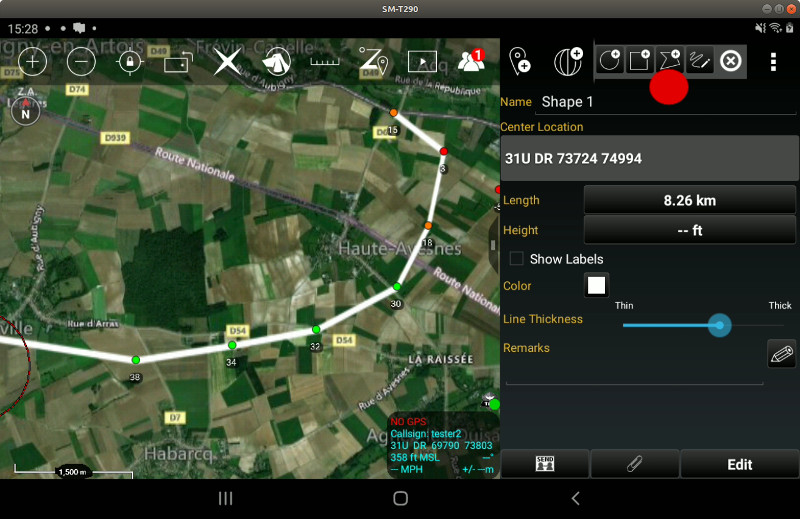
Point to Point (path profile)
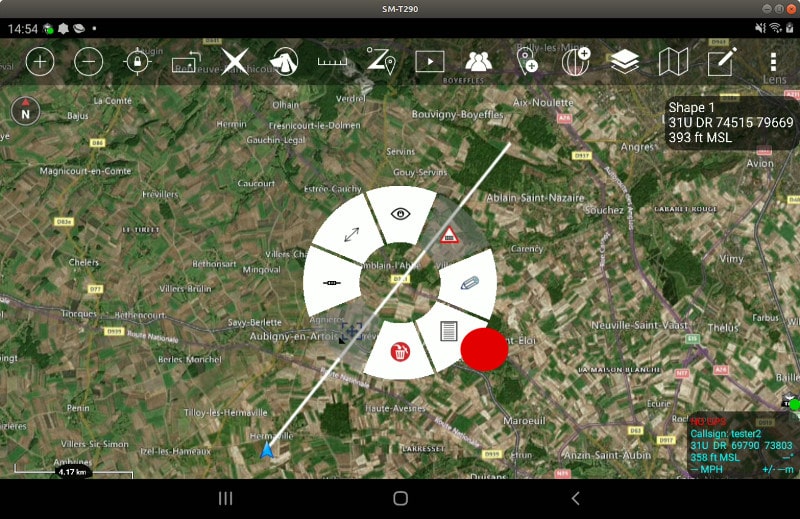
Using the ATAK draw tool, select polygon then draw a line on the map from one point to another. Select end then click on this line to open up the radial menu.
Send the line to SOOTHSAYER which will return the signal-to-noise ratio at the distant point based upon your chosen template.
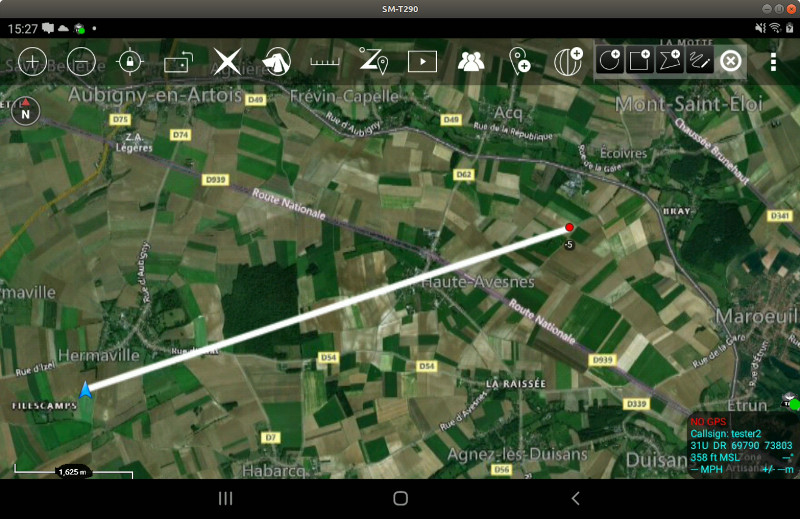
Point to Points
If you are not associated to a network or have requested to work alone (send join self) you will get coloured spotmap markers showing the signal as seen from the start point instead of coloured links. Using the ATAK draw tool, select polygon then draw a line on the map from one point to several other points. Select end then click on this line to open up the radial menu.
Send the line to SOOTHSAYER which will return the signal-to-noise ratio at all the points / vertices on the line. Each tested point will be simulated as the transmitter back to point 0 (receiver).
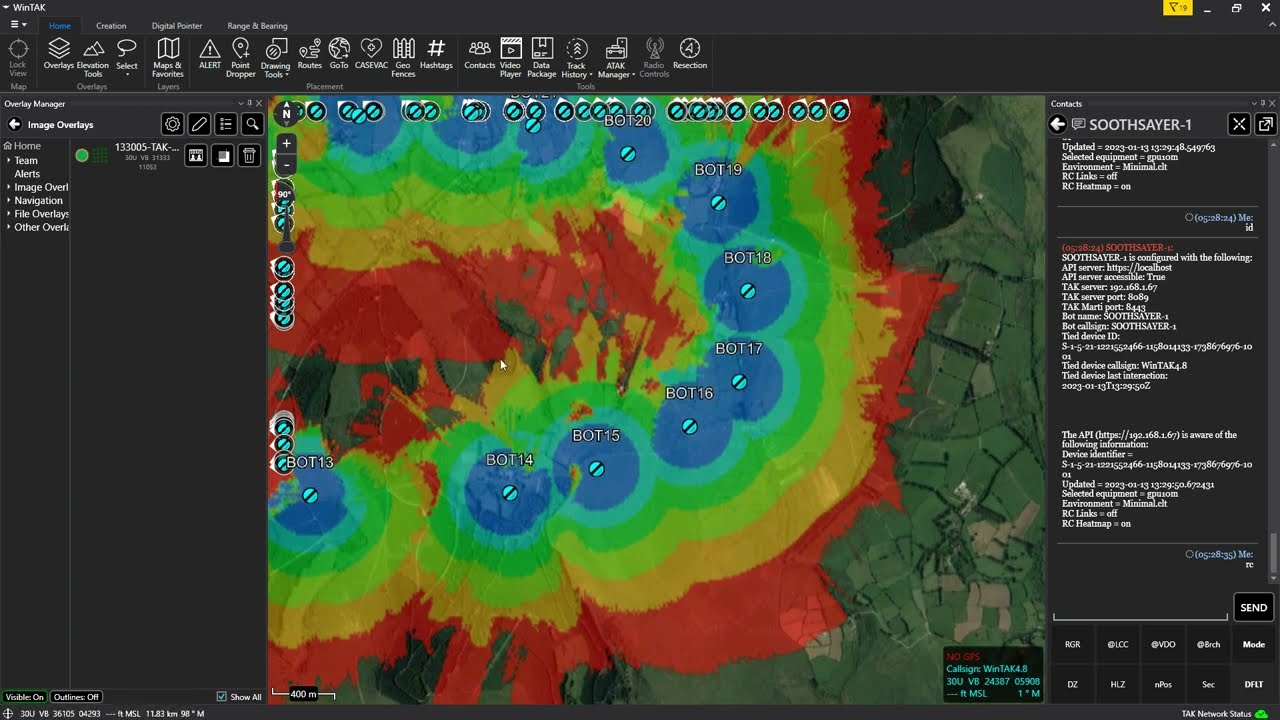
Multisite (MANET)
This feature has two outputs; links and coverage. You can toggle both these outputs using the chat commands links and heatmap. Links will reveal SNR polyline links between nodes and coverage will display the actual multipoint coverage around all the nodes as a single layer.
The network heatmap feature requires a GPU so either a Gold CloudRF plan or a private server is needed.
Using the ATAK polyline tool, draw a shape where each point/vertex represents a radio in the network.
Send the polyline to SOOTHSAYER which will return a coverage layer for the network.
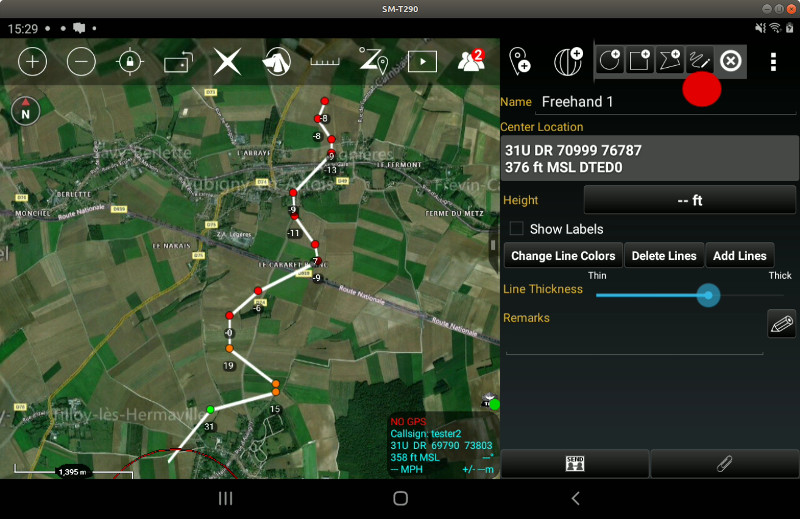
Route analysis
Using the ATAK telestration tool (scribble), draw a freehand route on the map from a start position. Select end then click on this line to open up the radial menu.
Send the line to SOOTHSAYER which will return the signal-to-noise ratio at each turn upon the route based upon your chosen template.
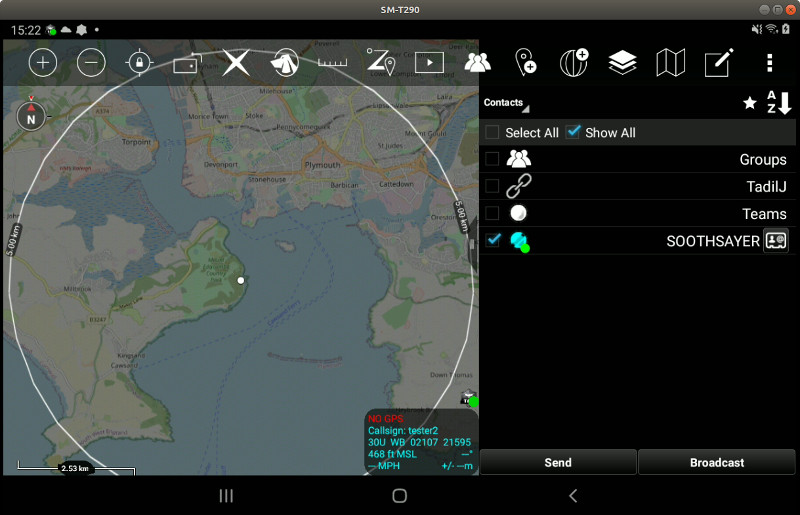
Point to Multipoint (area coverage)
Using the ATAK circle tool, create a circle with a desired radius representing RF coverage and send the circle to SOOTHSAYER.
This is potentially CPU intensive so can take several seconds to complete. Once complete an image overlay will appear on your map, styled according to the colour key in the template.

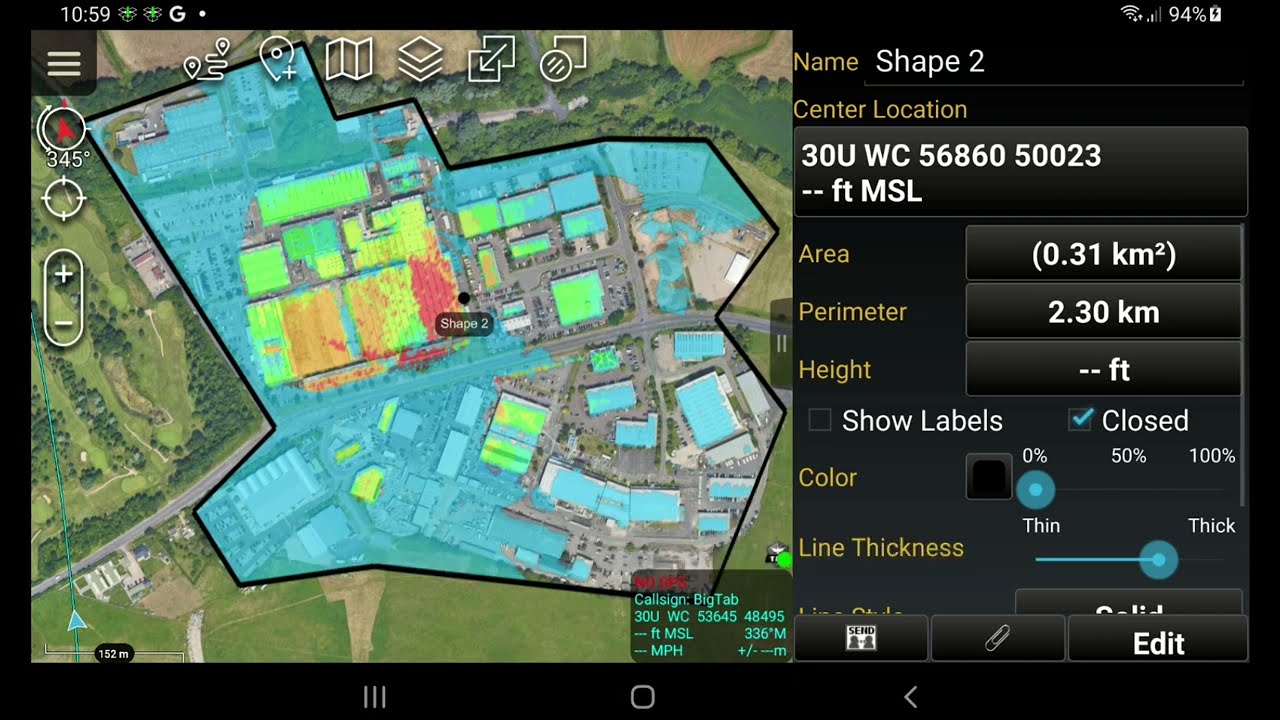
Best Site Analysis
Using the ATAK polygon tool, create a polygon around an area of interest then send the completed polygon to the SOOTHSAYER. For best results prepare a template which uses the free space path loss model, no diffraction and heights close to the ground eg. 2m. This will produce the dynamic range of results the algorithm needs to grade good and bad sites.
A data package will appear containing the resultant heatmap which is added as a layer.
Clutter
If you have created custom clutter within the web interface AND your template has custom clutter and landcover enabled, you can use it as 3D polygons in ATAK. Send the clutter command to the bot to download a KML with your items.
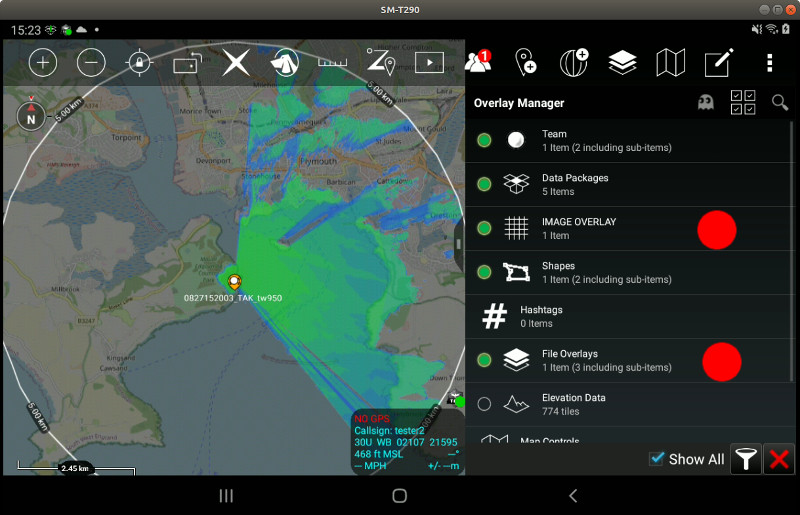
Layer management
If you create lots of area coverage plots and need to hide or share some, you can manage them using the ATAK layers menu. The actual coverage layer is listed as an image overlay and the placemark is a file overlay.
Traffic light colours
If a colour key is not defined in a template, default Signal-to-Noise ratios are represented with red, amber or green colours or lines. These correspond to up to:
RED = <= 15dB
AMBER = 15dB to 30dB
GREEN = >30dB
Levels are all relative to the noise floor which is defined within a template. A noise floor of -100dBm will therefore have an amber threshold between -85 to -70dBm.
WinTAK
Works in WinTAK also. This may be preferrable for planning larger networks and has been tested through the Multisite API with 160 simulated clients. A video is below.